Skip to content

This post may contain affiliate links. Please refer to our disclosure policy.
If your kids are anything like my three energetic boys, then you already know exactly how this goes: every backyard adventure, nature walk, park visit, or even a simple trip around the block ends with excited shouts of “Mom! Look what I found!” followed by pockets stuffed with treasures. Sticks, rocks, feathers, acorns, and — without fail — bugs. So many bugs.
Over the years we’ve been presented with everything from shimmering dragonflies and plump caterpillars to impressive beetles and delicate moths, all delivered with the kind of wide-eyed pride only a child can have. After years of gently redirecting “not in the house!” or watching their precious finds get lost, crushed, or tossed out, we finally decided to do something about it. That’s how our DIY insect display case came to life.
Table of Contents
This display case has become one of the best and most useful of family projects — a beautiful, protected little museum where insect discoveries can be safely stored, proudly displayed, and enjoyed every single day. Whether you’re just starting a nature collection, building out a homeschool nature table, or simply looking for meaningful ways to encourage outdoor play and curiosity, this homemade bug display case is the perfect solution. It’s affordable, educational, personal, and genuinely delightful to look at.

Why Make One Yourself
Store-bought insect display cases (often called bug display boxes) can be surprisingly expensive and small— many nice ones start at $50 and quickly climb to $100 or more. Once your kids start filling them, you’ll likely need several, which makes the cost add up fast. Building your own is a smart, budget-friendly choice that offers so much more than just savings. Here’s why we highly recommend making your own:
- Significant Cost Savings — Our entire display case cost less than $20 using mostly repurposed and inexpensive materials.
- Custom Size and Design — You can make it exactly the size and style that fits your space and your family’s collection instead of settling for whatever is available in stores.
- A Dedicated Home for Treasures — It gives your children (especially my bug-loving sons) a special, permanent place to proudly show off and safely store everything they find instead of bugs getting lost in drawers or accidentally ruined.
- Hands-On Learning Opportunity — The building process itself becomes a fantastic family project that teaches measuring, cutting, painting, assembling, and problem-solving.
- Encourages Respect for Nature — Having a proper display reinforces the idea that even small creatures deserve appreciation, turning “Look what I found!” into something meaningful and lasting.
- Creates a Conversation Piece — Our display case has become a favorite focal point in the homeschool room. The boys love examining new finds and will study the previous finds again and again. Most of the time their curiosity will lead to questions, browsing books, or even YouTube videos of bugs.
- Long-Term Durability — A well-made DIY case keeps specimens protected, dust-free, and visible for years, preserving memories from countless nature adventures.
- Sense of Pride and Ownership — Kids feel a much stronger connection to their collection when they help build the case and add new specimens over time.
Making your own insect display case isn’t just practical — it transforms fleeting childhood discoveries into something beautiful and educational that your family can enjoy together for a long time.
How to Make One

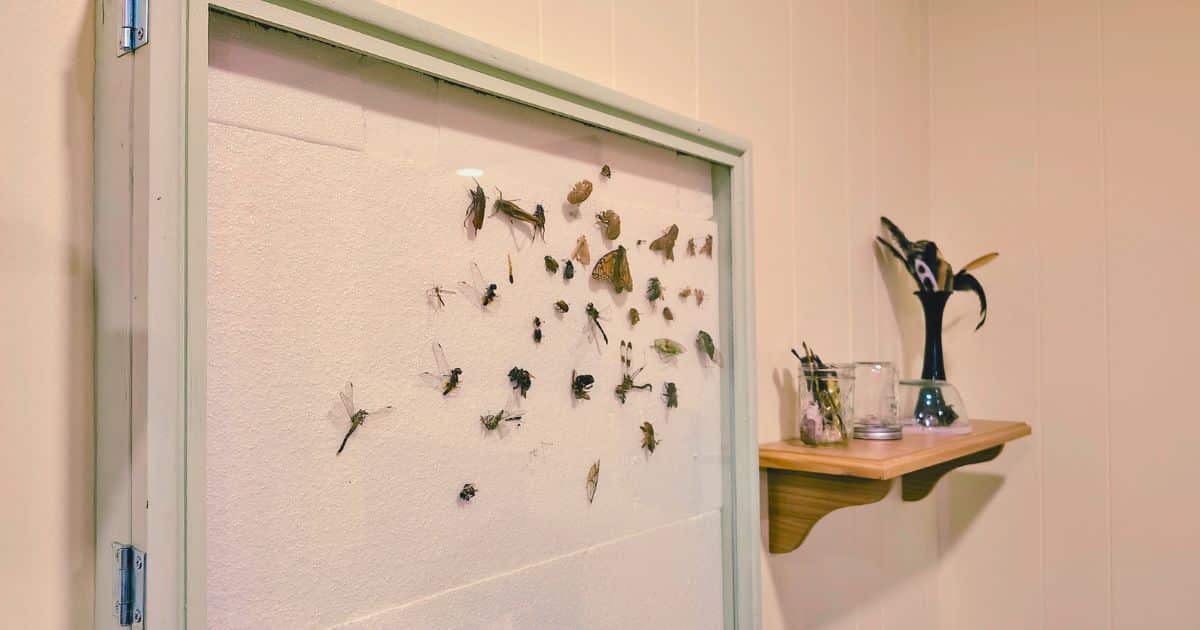
Making your own insect display case is a fantastic family project that feels rewarding from start to finish, especially when you get Dad or another handy person involved with the tools. We began with an old picture frame that still had its glass intact — choose one in the size you want your finished display to be. A thrift store is a great place to begin! Next, we used thin craft styrofoam sheets for the pinning surface and cut some thin, lightweight wood to build a simple box frame and solid backing.

Once the wooden box was assembled behind the frame, we painted both the outer frame and the box a nice color to give it a polished, professional look. We then securely glued the glass into the frame and attached the styrofoam sheet inside the box where the bugs would later be pinned.
To make the front open and close easily (which is really handy for adding new specimens or rearranging), we added hinges and a small hook and eye closure on the opposite side for a simple, secure latch. All you need after that are some basic entomology pins.

Because our case turned out fairly large and a bit heavy, Daddy first hung the completed box on the wall using very sturdy hardware. Once it was securely mounted, I glued the Styrofoam in place on top of the screws he used to anchor them into the studs. If you make a smaller version, you can keep it simpler with a regular picture frame backing and hang it like normal artwork. The whole build comes together in an afternoon or two and looks so good that people often think we bought it!
Now That You Have a Display Case
Collecting Dead Bugs
With your new insect display case proudly hanging on the wall (or sitting on a shelf), the real fun begins — it’s time to start filling it with treasures! In our family, we have a clear rule we always follow: we only bring in bugs that we find already dead. We never kill insects as part of this hobby. This gentle approach keeps the project peaceful, respectful, and stress-free while teaching the boys that every creature deserves kindness. When we spot a beautiful ladybug on the sidewalk, a motionless moth on the porch, or a beetle that didn’t survive the night, we carefully scoop it up and carry it home like a tiny, special gift from nature.
We often read this lovely poem Hurt No Living Thing by Christina Rossetti together to reinforce why we do things this way:
Hurt no living thing:
Ladybird, nor butterfly
Nor moth with dusty wing,
Nor cricket chirping cheerily,
Nor grasshopper so light of leap,
Nor dancing gnat, nor beetle fat,
Nor harmless worms that creep.
The short rhyme is easy for kids to remember and always sparks sweet conversations about caring for even the smallest living things. Having a dedicated display case makes collecting so much more exciting because there’s now a permanent, beautiful home waiting for each new find. The boys get genuinely thrilled when they discover a new specimen on our walks, knowing they’ll get to carefully add it to the collection later. It turns every outdoor adventure into a purposeful scavenger hunt while gently nurturing their love and respect for the natural world.

How to Soften a Dead Bug
Sometimes the bugs you find already dead have been sitting out in the sun or wind for a while and end up dried out, stiff, and brittle. This makes them difficult to position naturally in your display case — legs might snap off or wings won’t lay flat. That’s where a simple “relaxing chamber” comes in handy. It gently reintroduces moisture to soften the specimen without damaging it.
To make one, take a sealable plastic container and line the bottom with a paper towel or piece of cloth. Lightly dampen it with a mixture of equal parts water and rubbing alcohol (the alcohol helps prevent mold). Place a small raised platform inside — like a bottle cap, a piece of cardboard on legs, or a shallow dish — so the bug never touches the damp surface directly. Carefully place your dried specimen on the platform, snap the lid on tightly to trap the humidity, and set the container in a cool, dark spot for 24 to 48 hours.
Check on it once a day. You’ll know it’s ready when the body feels flexible and you can gently move the legs, antennae, and wings into a natural pose. Once softened, move quickly to pin it in your display case before it dries out again. This technique works wonderfully for everything from beetles to dragonflies and helps your collection look much more lifelike and professional.
Complete transparency here: softening a dead bug that is brought home is not usually high on my priority list, have I done it? Yes. Do I do it every time? Not at all! My motto is: Poor positioning in the insect display case is better than crumbled on the floor.

If You’re Willing to Kill Bugs
While we personally choose only to collect bugs we find already dead, some families prefer the option to collect live insects for their display. This will usually ensure completely intact wings, both antennae, etc. The insect won’t look like it was hit by a car, lost a battle, or been partially eaten. If this is the route you decide to take, here’s a safe and straightforward method using a kill jar.
Use a small, sturdy glass jar (never plastic). Place several cotton balls or a piece of cotton padding in the bottom and soak them thoroughly with rubbing alcohol. You can add a piece of cardboard or mesh on top of the cotton so the insect doesn’t sit directly in the liquid. Drop the insect inside, screw the lid on tightly, and leave it in an outdoor area or garage. Most insects will pass quickly — usually within 20 minutes to an hour or two depending on their size.
Once the specimen is no longer moving, remove it and either pin it right away or place it in a relaxing chamber if it needs softening first. Always work in a well-ventilated space, keep the jar far out of reach of young children while it’s in use, and wash your hands thoroughly afterward. Label the jar clearly and store it safely when not in use.
Again, this isn’t our family’s approach — we stick strictly to found specimens — but it’s a common method used by many hobbyists who want fresh, undamaged insects for their collections. When I was in middle school we were required to create an insect display case and this was the method my dad and I used.

Tips for Success
- Always label each specimen with a small pinned tag noting the date, location, and (if known) the insect’s name — it doubles as great handwriting and research practice. I hope to do this when my kiddos are a bit older and can do their own labeling – otherwise, it all falls on me.
- Use proper entomology pins or small sewing pins.
- Keep the display case in a cool, dry area away from direct sunlight to prevent fading and mold.
- Dust the glass gently with a microfiber cloth instead of liquid cleaners.
- Let the kids help arrange new bugs so they feel strong ownership of the collection.
- Start small — don’t feel pressure to fill the whole case at once. A few well-displayed specimens look better than a crowded one.
- Have extra pins, relaxing chamber supplies, and labels ready so adding new finds is quick and frustration-free.
- If a leg or wing breaks, don’t stress — it’s part of learning. Focus on the memories, not perfection. I will usually pin these right next to the body it fell off.
- Take periodic photos of the display so you can look back on how the collection grows over the years.
- Combine the display with regular nature walks to keep the excitement going.

Books About Bugs
Once your insect display case is hanging and beginning to fill up, it naturally becomes a powerful, hands-on homeschool learning center. What starts as simple bug collecting easily expands into rich lessons in science, observation, journaling, classification, and research. We have several field guides and bug books that we keep right beside the display so the boys can dive in whenever they add a new specimen. Here are some of our favorite books that work wonderfully with an insect collection:
- Big Book of Bugs by Yuval Zommer— This book introduces children to an array of bugs with facts and beautiful illustrations. Young children love it and quickly feel like experts while comparing their specimens to the pictures.
- Bugs by Emily Bone (Usborne Young Beginners) — A perfect first bug book with bright, close-up photographs and very simple text. It’s ideal for early readers and makes identifying common backyard insects approachable and exciting.
- Super Bug Encyclopedia: The Biggest, Fastest, Deadliest Creepy-Crawlers on the Planet by DK – huge variety of insects are included within the covers of this huge book. To give a complete picture for better understanding, the bugs are depicted much larger than their actual size making this a fun and informative book for all ages. Our family loves the DK books!
- National Geographic Pocket Guide to Insects of North America: From Your Favorite Field Guide Experts by Arthur V. Evans -a useful and compact guide to the insects of North America. Despite it’s size it’s full of facts, illustrations, and photographs.
Currently, we enjoy identifying the bug and either exploring it’s life cycle or maybe it’s role in the ecosystem. When the kids are older, I look forward to turning each new specimen into a larger lesson. The kids will closely observe it, sketch it in their nature journals, record the date and location, research its name and life cycle, and discuss its role in the ecosystem.

Fun Crafts and Activities to Pair with Your Insect Display Case
Your new bug display case makes an excellent centerpiece for lots of hands-on insect learning and creative fun. Once the boys have specimens to look at, we love extending the excitement with simple crafts and activities that reinforce what they’re observing. Here are some of our family’s favorites:
- The Different Ways Insects Eat — This is a fascinating activity that helps kids understand how mouthparts are specially designed for different diets. We compare a butterfly’s proboscis (like a straw), a beetle’s chewing mandibles, and a fly’s sponging mouth. The boys get to test how each works on the types of food these bugs prefer using a straw, tweezers, and a sponge! It’s a great follow-up after adding a new bug to the display.
- Play Act the Life Cycle of a Butterfly — Kids love acting this one out! We use simple props: plastic balls (egg stage), a crawling “caterpillar” (the boys love wiggling on the floor), a chrysalis made from a sheet or blanket (pupa stage), and finally dramatic wing-flapping as they emerge as butterflies (here we include flowers that they fly to with their straws and pretend to drink the nectar from). Pair it with a real butterfly specimen in your display case for a visual connection. This activity sticks with them and helps them remember the stages of complete metamorphosis.
- The Anatomy of an Insect — Turn your display case into a living diagram. We use a printable (grab yours for free by following the link) to label the three main body parts (head, thorax, abdomen), six legs, antennae, and wings. The boys use their pinned bugs to point out real examples of each part. This leads naturally into comparing insects with spiders (which have eight legs and two body parts) and other creepy crawlies.
- Make Your Own Bug Models — Using air-dry clay, pipe cleaners, pom-poms, and googly eyes, the kids sculpt their own versions of the insects in their collection. This is especially great for bugs that are too fragile to pin.
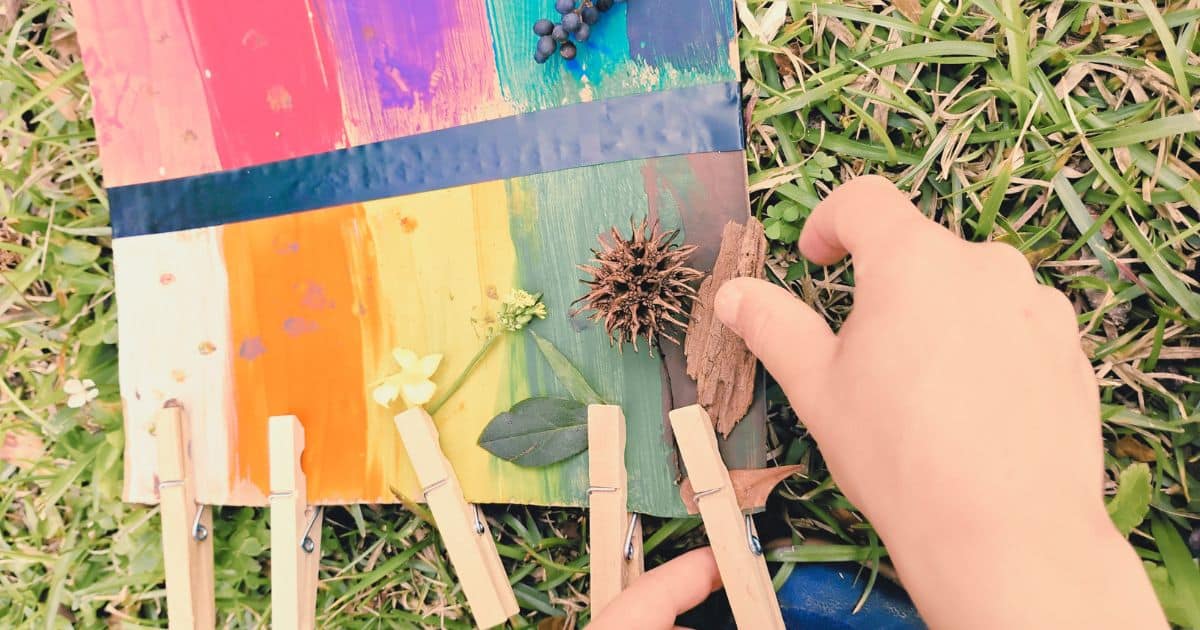
- Backyard Insect Scavenger Hunt — Create a simple checklist (or let the kids make one) with things like “something with wings,” “an insect with stripes,” or “a bug that jumps.” They search outside, observe without disturbing, and come back to sketch or describe what they found. It keeps the collection growing naturally while encouraging careful observation.
These activities keep the momentum going long after the display case is built. They turn a static collection into an interactive learning experience that my boys actually beg to do.

Proudly Display Your Dead Bugs
Building our DIY insect display case has been one of the most rewarding projects we’ve done as a family. It’s so much more than just a place to store bugs — it’s a celebration of childhood curiosity, a tool for learning, and a beautiful reminder of the wonders waiting right outside our door. My boys are incredibly proud of their growing collection, and I love watching them light up as they share their “museum” with friends and family.
If your children are fascinated by the tiny creatures around them, I can’t recommend this project enough. It’s inexpensive, educational, and creates lasting memories. Give it a try — you might be surprised how much joy a simple shadow box and a few pins can bring to your home.
Have you tried making your own bug display box yet? I’d love to hear about your family’s collection in the comments below. Happy exploring and happy collecting!
Insect Display Case
AT A GLANCE ACTIVITY INSTRUCTIONS
Materials
- Old picture frame with the glass still intact (choose one in the size you want your finished display case to be)
- Thin craft styrofoam sheets (enough to fit inside the frame as your pinning surface)
- Thin, lightweight wood (for building a simple box frame and solid backing)
- Paint (any color you like for the outer frame and wooden box)
- Strong glue (to secure the glass and styrofoam)
- Hook and eye closure (for a simple latch on the side so the front opens and closes easily)
- Entomology pins (for securing your bugs)
- Sturdy hanging hardware (if making a larger/heavier case; smaller versions can use regular picture-frame hangers)
Instructions
- Start with your old picture frame and carefully remove any existing backing or hardware if needed, leaving the glass in place for now.
- Have Dad (or your handy helper) cut and assemble the thin lightweight wood into a simple box frame that fits perfectly behind the picture frame, plus a solid backing piece. This creates the depth your display case needs.
- Paint both the outer picture frame and the newly built wooden box to give everything a clean, finished look. Let the paint dry completely.
- Glue the glass securely into the frame so it stays put and creates a nice viewing window.
- Attach the hook and eye closure to the side of the frame and box — this creates an easy-to-open latch so you can add or rearrange bugs without hassle.
- Once the painted box is fully assembled and dry, hang the completed wooden box on the wall first using very sturdy hardware (especially important if yours is large and heavy like ours was). This makes the next steps much easier and safer.
- With the box securely mounted, glue the thin craft styrofoam sheet inside the box as your pinning surface.
- Add your entomology pins, and you’re done! The case is now ready for bugs.
Recent Posts on the Blog