PIN THE HEART
The best human anatomy game for kids.
— By Julie Hodos on June 30, 2024; Updated on December 28, 2025.

This post may contain affiliate links. Please refer to our disclosure policy.
I’m a busy mom juggling three energetic boys while trying to sneak in some learning through play—you know how magical it can be to turn a simple game into an educational adventure? Remember the classic Pin the Tail on the Donkey from your own childhood? All those blindfolded spins, the room full of giggles, and the triumphant (or hilariously off-target) cheers when the tail finally stuck? It was pure joy, but let’s be honest: it didn’t exactly teach us much beyond coordination and a good laugh.
Table of Contents

What if we could recapture that same whirlwind of fun while slipping in some real smarts? Enter Pin the Heart, our family’s go-to human anatomy game that’s equal parts silly and smart. Designed especially for 4-7-year-old’s, this twist on the classic pins the focus on where our hearts really live in our bodies—right in the chest, slightly to the left. It’s a gentle introduction to human anatomy that feels like play, not a lesson. And the best part? It sparks curiosity about the incredible machine inside us all: our bodies!
Here, I’ll walk you through everything you need to know to set up, play, and even expand Pin the Heart into a full-blown human anatomy lesson. We’ll cover prep tips, game rules, hilarious mishaps (and how to turn them into teachable moments), variations to keep things fresh, and ties to a whole week of heart-themed fun. By the end, you’ll have a ready-to-go activity that’s as practical as it is memorable. Let’s dive in—your little one’s laughter (and learning) awaits!
Why Turn Playtime into a Human Anatomy Game?
Before we get to the how-to, let’s chat about the why. At these young ages, kids are like sponges—curious explorers with endless “whys?” about the world around them. But sitting down with a textbook or worksheets? That usually ends in wiggles and wandering attention. That’s where human anatomy games like Pin the Heart shine. They blend movement, sensory fun, and subtle education to make concepts stick without feeling forced.
Think about it: Learning about the heart isn’t just rote memorization. It’s understanding that this fist-sized powerhouse pumps blood to every corner of our body, keeping us running, jumping, and hugging. By playing a human anatomy game, you’re helping your child:
- Build Body Awareness: Kids start connecting “me” with “how my body works,” fostering confidence.
- Boost Fine and Gross Motor Skills: Spinning, reaching, and sticking build hand-eye coordination and balance.
- Spark Scientific Curiosity: Mistakes, like placing the heart on the belly, naturally lead to bigger explorations of organs and systems.
- Create Family Bonds: Everyone plays—siblings, parents, cousins, even grandparents—turning learning into shared joy.
Research backs this up too: Play-based learning enhances retention by up to 90% compared to passive methods, according to child development experts. Plus, in our screen-heavy world, these tactile games are a breath of fresh air. Pin the Heart is the perfect gateway to exploring the human anatomy. Your child will naturally become interested in where other organs are located leading to an anatomy puzzle or coloring page activity.
Read Next: Exploring Body Organs for Kids

Books to Connect and Teach
One of the sweetest ways to drive curiosity about human anatomy for your child is through the wonder of picture books. The right books turn “Where does my heart live?” into a story they beg to hear again and again. Below is the expanded, mom-tested, kid-approved book list I keep ready to read in our reading basket during heart week. I’ve grouped them by the exact feeling or concept they teach best, with honest notes on which ones my 4-year-old vs. my 7-year-old reach for first.
Books that Teach Real Anatomy
(These feel like adventures, not lessons)
- The Magic School Bus: Inside the Human Body by Joanna Cole is for ages 4–7. Why we love it: Ms. Frizzle’s class shrinks and journeys through Arnold’s body—from digestion to bloodstream to heart and lungs—in this hilarious, fact-packed adventure.
- The Busy Body Book by Lizzy Rockwell is for ages 3–6. Why we love it: A diverse cast of kids running, jumping, and eating while the text explains lungs, muscles, bones, and—yes—the heart. The last page has a clear diagram of the heart pumping blood with arrows.
- Human Body: Interactive Human Body Flap Book For Curious Young Minds by Louie Stowell is for ages 4–7. Why we love it: The book is full of surprises that will fascinate kiddos about their heart, lungs, digestive system and more.
Books that Connect the Heart to Emotions and Family
(Great for Valentine’s week or anytime you need extra hugs)
- The Heart and the Bottle by Oliver Jeffers is for ages 4–5. Why we love it: A little girl puts her heart in a bottle to keep it safe… until she forgets how to feel wonder. The illustrations are dreamy, and the moment she frees her heart again always leads to the best conversations about being brave with our feelings.
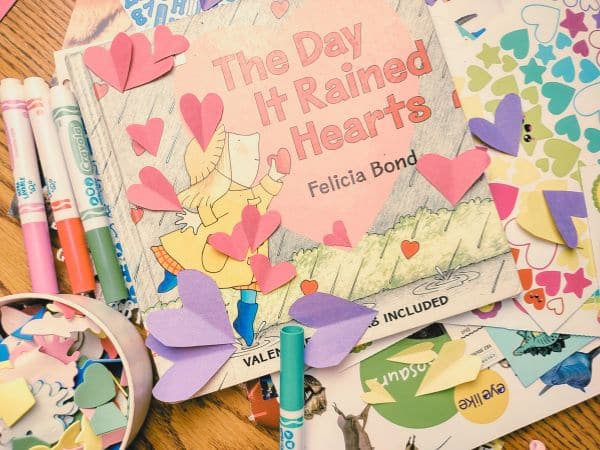
- The Day It Rained Hearts by Felicia Bond is for ages 3–6 Why we love it: One magical day, hearts rain from the sky, and clever Cornelia Augusta catches them to craft special valentines—each uniquely shaped heart perfectly matches a different friend.
Read Next: Valentine’s Day Crafts for Preschoolers
How to Play Pin the Heart
Pin the Heart is our favorite launchpad for learning about human anatomy. If you’re homeschooling, preschool prepping, or just winging it at home, this theme weaves literacy, art, and science seamlessly. Imagine mornings reading books about human anatomy, afternoons crafting a heart pump, and evenings cuddling up to connect the heart with emotions.
One of the things I love most about this human anatomy game? It’s doable in under 30 minutes with stuff you likely have on hand. No fancy supplies, no mess marathons. Let’s break it down step by step.
Play Prep
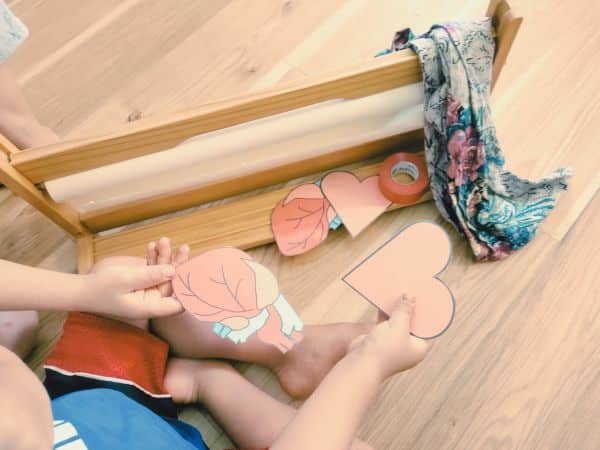
Step 1: Grab Your Free Printable Hearts
Grab the free printable below. You’ll get two options: cute, valentine-style hearts for the littlest ones, and realistic anatomical hearts for those ready for the real thing. Print multiples or make them durable by laminating for repeated use.
Step 2: Create Your Life-Sized Canvas
This is where the magic happens: Turning your child’s body into the game board.
- Materials: Grab a roll of craft butcher paper (18-24 inches wide—this affordable one is gold) or recycle brown packing paper from Amazon deliveries. Tape sheets together if needed for a full-body trace.
- The Trace: Have your kiddo lie down, arms slightly out from their sides, legs relaxed. Use a washable marker to outline their silhouette. Giggle through wiggles!
- Coloring Chaos: Hand over crayons or markers and let creativity loose. My 7-year-old added vein highways in blue and red; my 4-year-old colored out the eyes -he’s always had a bit of a Tim Burton vibe to his art. No rules here—it’s their art.
Step 3: Mark the Heart’s True Spot
Time for a mini anatomy chat: “Hey, buddy, where do you think your heart lives? In your tummy? Your foot?” Let them guess—silence older siblings to avoid spoilers. Then, draw a bold heart outline on the chest, slightly to the left. Use whatever color marker you need to differentiate the heart outline compared to the colors your child used.
Step 4: Prep the “Pins”
Flip those printed hearts over and affix a loop of masking tape to the backs (sticky side out). If laminating, these become reusable gems—store them post-play for next time.
Total prep time: 20-30 minutes. Mess level: Low. Kid involvement: High. You’re set!

Let’s Play: Blindfolds, Spins, and Anatomy Giggles
With everything ready, it’s showtime! My boys become so energized playing this game: jumping, clapping, and the laughter rolling. Hang your masterpiece on a wall at kid height—clear space around it to avoid toe-stubs. Explain the goal: “Pin the heart where it belongs on the body!” Keep rules loose; the joy’s in the journey.
The Basic Play Loop
- Blindfold Up: Use a soft scarf, headband, or even a sleep mask.
- Spin Cycle: Give 3-5 gentle spins—hold hands to steady. Face them toward the wall.
- Pin It! Guide a step forward: “Reach out and stick your heart where it belongs!”
- Reveal and React: Unveil the placement. Close? Cheer! Wild miss? Laugh and allow it to lead to more discussion about human anatomy
Repeat rounds again and again. Involve everyone: Siblings spin each other, my boys “guided” me to pinning a heart on my elbow—cue all three boys roaring with laughter!
My boys could probably play this for hours if I was able to devote that kind of time to referring their play. I step away after several rounds of each boy taking a turn. They continue playing until someone stops playing fair or they get too rough and someone’s head is bumped. The butcher paper remains up on the wall for a few days though which allows the boys to play more again the next day and the next.
Turning Misses into Learning Opportunities
Misses are goldmines for Pin the Heart. Keep it light and questioning:
- Arm Placement: “Ooh, heart in the arm? That’s where our muscles flex for high-fives! What does a muscle do?”
- Belly Blunder: “Tummy heart? Nope—that’s home to the stomach, where pizza parties happen! Feel your belly growl?”
- Head High: “Brain zone? Smart guess—the brain guides all our movements and ideas. Including making your heart pump!”
Even “wins” on the skin prompt: “Skin’s everywhere—it’s our body’s superhero shield!” These chats last 30 seconds max, blending humor with facts. For 4-year-olds, stick to one fun fact; 5-year-olds and up can handle “What if?” scenarios.
Read Next: 20+ Heart Activities for Kids

More Human Anatomy Activities
- X-Ray Play Dough Mats Print or draw a blank child silhouette and laminate it. Give black and white play dough and have kids roll “bones” and press them into arms, legs, ribs, and skull to create their own play-dough X-ray. Learning opportunity: Teaches basic skeleton structure and that bones are hard and hidden under our skin.
- Lung Blow-Up Tape two lunch paper bags to a Y-shaped straw or rolled-paper “trachea” to make model lungs. Pinch the bottoms and blow gently through the straw to watch them inflate. Talk about how real lungs fill with air every time we breathe. Learning opportunity: Shows how lungs expand and shrink and connects breathing to being alive.
- Brain Hat Craft Grab a free printable online of a the different centers of the brain. After coloring and cutting it out, wear it proudly! Learning opportunity: Teaches that the brain is protected inside the skull and controls thinking, seeing, and moving.
- Digestive Slide Snack Eat a cracker or piece of bread together, then act it out: chew (mouth), swallow (slide hand down throat), squish in tummy (hug belly), wiggle through wavy intestines (snake arms), and finally “poop” it out with giggles. Learning opportunity: Gives a silly but accurate sequence of how food travels from mouth to toilet.
- Muscle Power Rubber-Band Pull Create a “working” muscle using rubber bands and popsicle sticks. Explain that muscles work the same way to help us move our bones. Try making a fist and feeling the muscle bulge on your forearm. Learning opportunity: Introduces the idea that muscles pull on bones to create movement.
- Skin Sensory Treasure Hunt Blindfold your child (or just close eyes) and gently touch different textures to their arm: soft feather, rough sandpaper, cool spoon, prickly pine needle. Ask, “What part of the body is telling you hot, cold, soft, scratchy?” (Skin!) Learning opportunity: Shows that skin is the body’s largest organ and gives us our sense of touch
- Blood Flow Bracelets String red and blue beads (or dyed macaroni) on pipe cleaners to make “blood flow” bracelets: red beads = oxygen-rich blood going out to the body, blue beads = blood coming back to get more oxygen. Wear one on each wrist and march around delivering “oxygen.” Learning opportunity: Simple introduction to circulation and why blood needs the heart and lungs.
- Blood Flow Model: Using jars, a balloon and straws create a heart model that demonstrates how blood is pumped throughout the body. Learning opportunity: Gives a realistic demonstration of how a heart moves blood throughout the body.
These eight activities are best planned to be scattered across a week or two after you play Pin the Heart. Each one takes 10-30 minutes, uses things you already own or can grab for a couple of dollars, and leaves your child saying, “Let’s do another tomorrow!” Mix and match based on your child’s current obsession—lungs one day, the brain the next—and watch their human anatomy literacy (and confidence) grow one playful discovery at a time.
Read Next: Explore the 5 Senses in Nature

Why Pin the Heart Steals the Show
From inducing giggles to triumphant pins, this human anatomy game has won over my crew hook, line, and heart. Rolled up and stored, it’s always ready for encores. Kids beam discussing “My heart’s here, not in my toe!” And as a mom, I adore the easy setup that yields high-impact bonds.
Ready to try? Download the printable (above) and drop a comment below sharing how it went with your kiddos. Here’s to hearts full of laughter and learning!
Pin the Heart
AT A GLANCE ACTIVITY INSTRUCTIONS
Materials
- Large craft paper roll
- Masking tape
- Headband or scarf
- Free Printable
*laminator
*cardstock
Instructions
- If you want this activity to last you can print on cardstock or even on regular paper but then laminate it. This isn’t necessary though!
- Print the accompanying heart printable a few times. I have included a real looking heart and the shape of a heart. The age of your child will determine which you want to print. You can also cut hearts out of red construction paper if you wish to skip the printer.
- Have your child lay down on the craft paper with their arms and legs slightly out.
- Trace their body with a black marker. Draw a heart on the traced body where a heart is located.
- Once done, hang it on an empty wall that is at the same height as your child and has space around it.
- Taking the hearts, individually place a roll of tape (so that it’s sticky side out) on the back of each.
Let’s Play
- Explain to your child that their goal is to pin the heart on the heart you drew. Hand your child a heart and blindfold them.
- Spin them around and then face them to the wall with the paper and tell them “go!”
- Let them attempt as many times as they want and don’t forget to get in on the fun and be blindfolded having them spin you around and around.
- Take off hearts and retape as needed.
- Celebrate any victories.
Recent Posts on the Blog