A SMASHING GOOD TIME
Break your own geodes!
— By Julie Hodos on January 12, 2025; Updated on February 10, 2026.

This post may contain affiliate links. Please refer to our disclosure policy.
If you’ve been hanging out here for a bit, you know I’m constantly scouring for those golden activities that make my kiddos’ eyes sparkle with pure joy, curiosity, and that unbridled excitement that only little ones can muster. But let’s be real—sometimes I stumble upon something that gets me just as pumped as them. I mean, who wouldn’t love an excuse to sit back, watch the magic unfold, and maybe sneak in a few sips of that afternoon tea without constant interruptions?
Table of Contents

Breaking open real geodes is hands-down one of those activities. Picture this: your preschooler, decked out in safety goggles, wielding a hammer like a mini Thor, and then—crack!—a dull, bumpy rock reveals a glittering crystal wonderland inside. The squeals of delight! The frantic dashes over to show off their treasure! The way my boys turn it into a team effort, cheering each other on as they tackle the tougher ones. It’s the kind of simple, hands-on fun that sticks with them (and you) long after the last shard is swept up. And honestly, I look forward to pulling out that kit as much as they do because it’s low-prep for me and high-reward for everyone.
Here, I’m spilling all the beans on how we incorporate “Break Your Own Geodes” into our homeschool volcano unit. We’ll cover the must-have supplies, step-by-step setup that keeps things safe and sane, age-appropriate ways to explain the science behind geodes and volcanoes, why this activity is a powerhouse for building independence and self-esteem, and tons of creative ways to extend the fun so it doesn’t end when the geodes run out. If you’re ready to turn your backyard (or patio) into a mini geology lab, let’s dive right in!

Why Breaking Geodes Is the Ultimate Volcano Activity
Let’s start with why this beats out the classic baking soda and vinegar fizz-fest every single time. Don’t get me wrong, we love a good eruption, but geodes bring a whole new level of engagement. The setup is ridiculously easy: no mixing solutions, no measuring ingredients, no cleanup of sticky goop. Just grab the kit, goggles, and a hammer, and you’re off to the races.
What really sets it apart is the element of surprise and challenge. Each geode looks like a plain old rock on the outside—nothing special. But inside? It could be a cascade of sparkly white quartz, deep purple amethyst veins, or even banded layers of pink and orange calcite. That mystery keeps kids hooked, swinging away with determination. It’s physical, it’s independent, and it feels a tiny bit adventurous (hello, real hammer!), but with the right safety measures, it’s completely preschool-appropriate.
In our homeschool, this activity isn’t just about fun—it’s stealth learning at its best. Kids practice fine motor skills with the hammer, learn patience when a geode doesn’t crack right away, learn teamwork, and get a crash course in geology without even realizing it. Plus, for parents like me who juggle multiple kids or just need a breather, it’s gloriously hands-off after the initial setup. I can observe from afar, jump in for the exciting reveals, and let them own the process. If you’ve ever felt burned out on over-involved crafts, this is your antidote.

Volcano Books We Love
No volcano unit is complete without some cozy storytime, right? We snuggle up with these favorites to build excitement before the hands-on stuff. They’re not just educational—they’re engaging enough that my kids ask for them over and over.
National Geographic Kids Everything Volcanoes and Earthquakes This one’s a visual feast with stunning real-life photos of eruptions, lava flows, and even geodes forming in volcanic rock. The short, punchy captions make it perfect for short attention spans, and my four-year-old loves flipping through it solo, pointing out the “fiery mountains.”
Volcano Dreams: A Story of Yellowstone by Janet Fox, illustrated by Marlo Garnsworthy. It’s a gentle narrative about the animals and plants that thrive around Yellowstone’s supervolcano. The artwork is dreamy and colorful, turning what could be a scary topic into something wondrous and approachable. We talk about how volcanoes can create new land and habitats, which ties beautifully into our geode discussions.
The Ultimate Book of Planet Earth by Anne-Sophie Baumann has pop-up spreads, including a massive volcano that “erupts” when you open the page. It’s tactile and exciting, helping little ones visualize lava bubbling up. We also pull in DK Life Cycles: Volcano by Sam Falconer, which breaks down the volcano life cycle in simple illustrations—dormant, active, extinct—and connects to other cycles like animals and plants for broader learning.
The Magic School Bus Blows Its Top by Joanna Cole. Ms. Frizzle and the gang dive into a volcano—literally—and it’s packed with fun facts delivered through adventure. My kids giggle through the whole thing, and it sparks questions like, “Mom, can we go inside a real volcano?” (Spoiler: No, but geodes are the next best thing!)
These books set the stage perfectly, getting kids curious and knowledgeable about volcanoes before we move to videos or experiments.

Volcano Videos for Little Kids
Videos are my secret weapon for bringing volcanoes to life, especially if your kids are visual learners or need a break from reading. We keep it short and sweet to match preschool attention spans.
Our go-to is the Learn Bright Volcanoes for Kids video—it’s about 9 minutes long, with cheerful cartoons, upbeat music, and kid-friendly facts like “Lava can be as hot as 2,000 degrees!” They explain types of volcanoes (shield, cinder cone, composite) in simple terms, and the animations show eruptions without being too intense.
For real footage, National Geographic’s Volcano 101 is a quick 4-minute clip with breathtaking drone shots of lava rivers and ash clouds. There’s minimal narration, so it’s not overwhelming, and it shows the power and beauty of volcanoes up close.
If your little ones need to wiggle, blast The Floor Is Lava song on YouTube. It’s a high-energy dance-along where kids jump around pretending the floor is molten lava—perfect for helping skip the post-screen time tantrums.
These videos are great bridges to hands-on activities, helping kids visualize concepts like lava cooling into rock, which leads right into our geode smashing.
How Volcanoes Actually Form
Understanding volcanoes starts with the basics, and I tailor my explanations to keep everyone engaged without glazing over eyes. Here’s how I break it down by age.
For preschoolers and kindergartners (ages 3-5): “Imagine the Earth is like a giant ball with a super-hot, gooey center called the mantle. Deep down there, rocks get so hot they melt into thick, red-hot magma—like really hot oatmeal with bubbles in it. The outside of the Earth is like a cracked eggshell, made of big pieces called plates. When those plates move and bump into each other, they make cracks.
The magma squeezes up through the cracks because it’s under a lot of pressure, like when you push too hard on a ketchup bottle. When it bursts out the top, it’s called lava, and it cools into new rock, building a mountain over time. That mountain is the volcano! Some volcanoes sleep for a long time, and some wake up with a big boom, shooting out ash and rocks.”
I use props like playdough for the mantle and a squirt bottle for the eruption to make it hands-on. This version keeps it fun and relatable, focusing on the “hot goo” and “big boom” to capture their imagination.
For older elementary kids (ages 6-10): “Volcanoes form mostly at the edges of tectonic plates—the giant slabs that make up Earth’s crust. There are three main ways: subduction zones, where one plate dives under another, melting rock into magma; divergent boundaries, where plates pull apart and magma rises to fill the gap, like in mid-ocean ridges; and hot spots, where a plume of super-hot mantle rock punches through the crust, creating island chains like Hawaii.
The magma is molten rock from the mantle, heated by radioactive decay and leftover heat from Earth’s formation. It’s less dense than solid rock, so it rises. As it nears the surface, dissolved gases (like carbon dioxide and water vapor) expand, building pressure until—eruption! Lava types vary: runny basalt from shield volcanoes creates gentle slopes, while thick, sticky andesite or rhyolite from composite volcanoes leads to explosive blasts.
Volcanoes can be active (recent eruptions), dormant (sleeping but could wake), or extinct (done forever). They shape our world—creating fertile soil, new land, and even influencing climate with ash clouds.”
You can pull up diagrams or use a globe to point out real examples, like Mount St. Helens or Kilauea, encouraging questions like “What if we lived near one?” This deeper dive satisfies curious minds while connecting to global geography.
Explaining volcanoes this way not only builds knowledge but sparks discussions about Earth’s dynamic nature, making the geode activity feel like a real piece of that bigger puzzle.
How Geodes Form
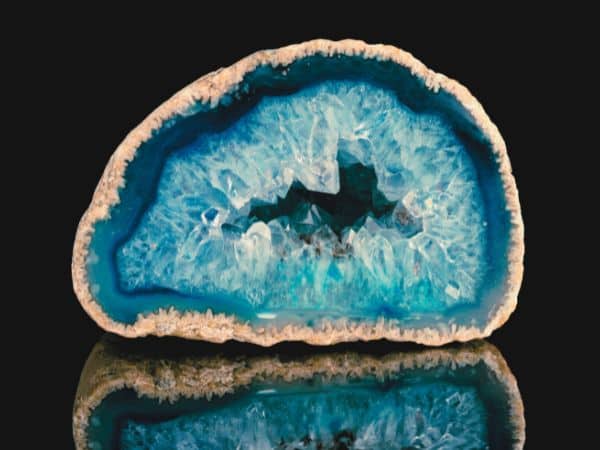
The big reveal moment is when that geode cracks and crystals sparkle, it’s prime teaching time. Here’s brief explanations, customized for different ages, incorporating the minerals and colors that make each one unique.
For preschoolers (ages 3-5) – Magical and bite-sized: “A super long time ago, volcanoes spit out hot, bubbly lava that cooled into rock. Those bubbles got stuck inside like secrets, making empty pockets. Then, special water with colorful bits of Earth magic trickled in. Over thousands of years the bits grew into shiny crystals! Clear sparkly ones are quartz, like fairy ice. Purple is amethyst, pink might be calcite, and bands of colors come from different minerals mixing, like stripes on a candy cane. Your geode is a treasure the Earth hid just for you!”
For slightly older preschoolers or young kindergartners (ages 5-6) – Add a touch more wonder: “The lava from volcanoes has gas bubbles, like fizz in soda. When it cools fast on the outside but slow inside, those bubbles turn into round holes. Rainwater, full of dissolved minerals, seeps down and fills the holes. As the water sits, minerals stick and grow crystals layer by layer.
Quartz makes the white or clear parts—super common and sparkly. If iron sneaks in and gets zapped by natural Earth energy, it turns purple amethyst. Calcite can be pink or orange from tiny iron bits, and agate bands form when silica layers build up in colors like red (from rust-like iron oxide) or blue (from copper traces). Each color tells a story of what was in the water long ago!”
For elementary kids (ages 7-10) – Real science with wow factor: “Geodes typically form in volcanic igneous rocks or sedimentary layers with cavities. In volcanic settings, gas bubbles in cooling lava create vugs—hollow spaces. Groundwater, rich in silica (SiO2) and other minerals, infiltrates these vugs. Through precipitation and crystallization, minerals deposit on the walls, growing inward.
Key minerals and colors:
- Quartz (SiO2): Clear, white, or smoky; forms the base for most crystals. Drusy quartz creates that bumpy sparkle.
- Amethyst: Purple quartz colored by iron (Fe) impurities oxidized and irradiated by gamma rays from radioactive elements in surrounding rock.
- Calcite (CaCO3): Often white, but pink/orange from manganese or iron inclusions; forms smooth bands or dogtooth crystals.
- Agate/Chalcedony: Banded varieties with colors from trace elements—red/brown from iron oxides (hematite), green from chlorite or celadonite, blue from copper silicates.
- Celestite: Rare blue from strontium; smoky quartz from aluminum.
Banding happens in stages as mineral concentrations change over millennia. Some geodes have multiple layers, like tree rings, showing environmental shifts. Rare ones even trap water or oil inside!”
We use the kit’s brochure to identify specifics, like “This banded one is agate with hematite staining!” It turns them into mini-geologists, eager to research more.
These explanations evolve with their questions, keeping the activity educational yet exciting for all ages.

Break Your Own Geodes
Materials We Actually Use
Let’s talk gear—because the right tools make all the difference between smooth sailing and chaos.
The star is the National Geographic Break Open Geodes Kit—it comes with 10 real geodes, a learning guide, magnifying glass, and display stands. This one is affordable online.
Safety first: These Kids Safety Glasses are our pick. They’re shatterproof and actually comfortable so kids don’t yank them off. We have a pair for each child to avoid fights. Adults should wear some too, just in case.
For the hammer, a standard hammer from your toolbox works great—getting to use Daddy’s hammer is always exciting. We’ve also used a hammer and screwdriver for super-stubborn geodes, but that’s when I step in and do the cracking.
Containment hack: Slip the geode into an old sock or pillowcase before swinging—it catches most shards, making cleanup a breeze, especially indoors on rainy days. For the surface, concrete is key: a spare cinder block (grab one cheap at a hardware store) provides the hard base needed. Avoid grass or wood—it absorbs the impact and makes the swings less effective. You can also use a cement patio or sidewalk, just be aware that small dents may occur from missed swings.

How to Do It Without Anyone Losing an Eye
Setup is straightforward, but following these steps keeps it safe and enjoyable.
- Choose your spot: Outdoors on concrete for easy cleanup. Clear a wide area—kids need swing room without bumping.
- Gear up: Goggles on everyone, including watchers. Review rules: “One hammerer at a time, stand back, glasses stay on!” More below!
- Demo first: I crack one geode to show proper form—hold hammer firmly, aim for the middle, swing from the elbow not wildly.
- Hand over control: Let them pick a geode, place it (sock optional), and go for it. Encourage “Tap gently first, then harder if needed.”
- Celebrate reveals: When it cracks, gather round to admire. Use the guide to name it—“Look, quartz crystals with amethyst veins!”
- Troubleshoot: Stubborn one? Suggest turning it but if it won’t budge, set aside and try later.
- Wrap up: Collect pieces in a bowl, sweep shards, wash hands. Display favorites on a windowsill.
Safety is non-negotiable with hammers involved. Goggles protect from shards— we’ve had close calls, but never issues. Supervise swings, especially with toddlers and make sure all kiddos understand that they need to make sure everyone’s hands are well away before they swing. I’m usually in a lawn chair watching from a safe distance.
If a geode’s extra hard, don’t force it; switch to another to avoid frustration. Then at the end a parent can step in and try breaking it with a hammer and screwdriver.

Why This Builds Confidence Like Nothing Else
This activity isn’t just smashing rocks—it’s a masterclass in life skills, disguised as play.
Physically, gripping and swinging hones coordination and strength. Emotionally, facing a tough geode teaches resilience: “It didn’t crack? Try a different spot!” Watching them pivot strategies boosts critical thinking.
Socially, with multiples, it fosters teamwork—my boys naturally divide roles, if the first strike failed to break it another reaches forward and replaces it on the cinder block before sitting back and watching. The teamwork that naturally occurred was adorable. I step back after giving rules, letting them lead, which skyrockets self-esteem. I’m still close and present to make sure rules continue to be followed to keep safety our first priority.
Then, when my kiddos do finally crack one open they bring it over and we “ooh” and “ahh” over it while examining the colors. They love getting to show me, observe, and experience the geodes together.
Your Turn!
Have you tried geodes yet? Share your stories—was it the sparkles, the smashing, or the science that hooked your crew? Favorite variation? Drop a comment—I love getting new ideas! Here’s to endless hours of discovery, laughter, and those priceless “aha!” moments with your little explorers!
Break Your Own Geodes
AT A GLANCE ACTIVITY INSTRUCTIONS
Materials
- Firstly, Geodes smashing kit
- Hammer(s)
- Hard surface
- Eye protection
- Lastly, long sleeves and pants
Instructions
- Based on the materials needed it looks like we’re getting ready to do something dangerous but this activity is super safe. The extra protection just keeps your child from getting “stung” by a small piece of rock. The glasses are a must.
- The Geodes kit is very thorough in its information about the geodes & types. I won’t get into it too much here.
- After your child is properly attired with glasses on, go at the geodes with your hammers.
- As the beautiful crystals inside are revealed identify them and then smash another. One in our entire kit was too hard to open, even for me with just a hammer so I used a screwdriver and hammered the back of it. Proceed at your own risk.
Recent Posts on the Blog