Skip to content

This post may contain affiliate links. Please refer to our disclosure policy.
Looking for a vibrant, engaging, and educational indoor activity to captivate your kids? This rainbow craft is a magical science experiment that transforms a simple paper towel into a stunning display of colors. This hands-on rainbow craft is perfect for teaching children about the colors of the rainbow (ROYGBIV: red, orange, yellow, green, blue, indigo, violet) while introducing scientific concepts like capillary action and color blending. With just markers, a paper towel, and water, you can create a memorable rainbow craft that doubles as a piece of art.
Here, we’ll explore books and poems to inspire your rainbow craft, guide you through the step-by-step process, explain the science behind it, offer tips for engaging kids, and provide ideas to extend the fun. Let’s dive into this colorful rainbow craft adventure!
Table of Contents

Why this Rainbow Craft
The rainbow craft is a fantastic way to blend science and art. Ideal for rainy days, weekends, or any time you want to spark curiosity at home, this rainbow craft offers numerous benefits:
- Educational Value: Kids learn the sequence of rainbow colors (ROYGBIV) and discover capillary action, the process that moves water through materials.
- Simple Supplies: You likely have markers, paper towels, and water at home, making this rainbow craft budget-friendly.
- Engaging for All Ages: From toddlers to teens, everyone can participate, with adjustments for different skill levels.
- Quick and Mess-Free: The rainbow craft takes minutes to set up, with results in under 10 minutes and minimal cleanup.
- Creative Outlet: The finished rainbow craft can be dried and displayed, adding a personal touch to your home’s decor.
Whether you’re a parent, caregiver, or educator, this rainbow craft is a must-try for creating lasting memories while learning. Let’s get started with some inspiring rainbow-themed reading.
Looking for More Rainy Day Activities?: Indoor Activities for Kids

Books and Poems About Rainbows
Before diving into the rainbow craft, set the stage with books and poems about rainbows to spark excitement and deepen the experience. These selections foster literacy and connect to the craft’s themes of color, nature, and wonder. Here are recommended titles and works to explore as a family, perfect for reading aloud:
- When You See a Rainbow by Becki Dudley
This beautifully illustrated book explores rainbows through a Christian lens, highlighting their beauty as part of God’s creation. The simple text and vibrant images make it ideal for young children and complement the rainbow craft’s colorful outcome. - Raindrops and Rainbows by Patti Hamilton
This story blends science and storytelling, explaining how raindrops and sunlight create rainbows. It’s perfect for curious kids eager to understand the science behind real rainbows - A Rainbow of My Own by Don Freeman
In this classic tale, a child imagines having their own rainbow, sparking creativity. The whimsical story pairs well with the rainbow craft, encouraging kids to dream big. - Planting a Rainbow by Lois Ehlert
This colorful book follows a child and parent planting a garden with flowers in every rainbow color. Its vibrant illustrations and simple text tie directly to the rainbow craft’s ROYGBIV focus. - The Usborne Big Book of Colors by Felicity Brooks
This interactive book explores colors, from common objects for each color to the emotions each color evokes. It has fun facts and engaging visuals. It’s a great resource for learning about colors before starting the rainbow craft. - The Rainbow by David McCord (from Doubleday’s Favorite Poems: Old and New)
This short, lyrical poem captures the fleeting beauty of rainbows, perfect for reading aloud. Its vivid imagery enhances the rainbow craft’s visual appeal.. - My Heart Leaps Up by William Wordsworth
Wordsworth’s classic poem reflects on the joy rainbows inspire, suitable for older kids or families who enjoy deeper discussions.
How to Incorporate These:
- Create a Reading Nook: Set up a cozy corner with blankets and snacks to read these books or poems before the rainbow craft.
- Connect to the Craft: After reading, ask kids to compare the book’s rainbows to their upcoming rainbow craft. For example, “How might your craft look like the rainbow in A Rainbow of My Own?”
- Extend with Art: Have kids draw scenes from the books or poems, incorporating the ROYGBIV colors they’ll use in the craft.
These books and poems enrich the rainbow craft, blending literacy with the excitement of creating something colorful.

What You’ll Need for the Rainbow Craft
Gather these simple materials to create your rainbow craft. The accessibility of this project makes it easy to start right away.
- 7 Markers (ROYGBIV Colors): Red, orange, yellow, green, blue, indigo, and violet. Washable markers are ideal for easy cleanup, but any water-soluble markers work.
- Paper Towel: A single sheet of white paper towel. Choose a sturdy brand to prevent tearing when wet.
- 2 Small Bowls of Water: Shallow bowls or cups filled with about an inch of water.
- Scissors: To trim the paper towel to the correct size.
- Optional Support: A small object (such as, a book, block, or folded towel) to prop up the paper towel’s center if needed.
Safety Note: Supervise young children with scissors and ensure markers are non-toxic. Keep water bowls stable to avoid spills.

Step-by-Step Instructions
Follow these steps to make your rainbow craft. The process is simple, but I’ll provide detailed guidance to ensure success and maximize engagement.
Step 1: Prepare the Paper Towel
Trim the paper towel to the right size for your rainbow craft. A standard paper towel is about 11 inches long and 6 inches wide, but you’ll need it slightly smaller.
- Cut the Paper Towel: Use scissors to remove about 2 inches from the length (9 inches long) and 1 inch from the width (5 inches wide). This size ensures the water travels a manageable distance to form the rainbow craft.
- Why This Matters: A smaller paper towel allows the colors to meet quickly, keeping kids engaged. A larger towel slows the process and may lose vibrancy of the colors as the water and color move up the towel.
Tip for Kids: Let older children measure and cut the paper towel to practice fine motor skills and measurement. For younger kids, pre-cut the towel but let them touch it and predict what will happen when it gets wet.

Step 2: Color the Paper Towel
Add the rainbow colors to the paper towel.
- Draw the Colors: On both short ends of the paper towel, color seven equal bands using the ROYGBIV markers (red, orange, yellow, green, blue, indigo, violet). If you do not have indigo simply both purple and blue on top of each other. Indigo is the color between blue and violet so it’s a purple with more blue. Each band should be about 0.7 inches wide (no need for perfection) and extend just over 1 inch inward from the edge. Align the colors across from each other (e.g., red on the left end faces red on the right end).
- Example Layout:
- Left end: Red (top), orange, yellow, green, blue, indigo, violet (bottom).
- Right end: Red (top), orange, yellow, green, blue, indigo, violet (bottom).
- Coloring Tips: Press firmly to apply enough ink, but don’t soak the paper towel to avoid tearing. Scribbles are fine as long as each color is distinct.
Why This Matters: The water will carry the marker ink upward, so colors need to be near the edges where the towel touches the water. Alignment ensures a symmetrical rainbow craft.
Tip for Kids: Teach the ROYGBIV acronym to memorize the color order. Ask kids to name objects matching each color (such as, apple for red, sky for blue). If indigo and violet are hard to distinguish, explain that indigo is a deep blue and violet is closer to purple. We may see these colors during a sunset.

Step 3: Set Up the Experiment
Prepare the water bowls and position the paper towel to start the rainbow craft magic.
- Arrange the Bowls: Place two bowls of water on a flat surface, about 6–7 inches apart. This allows the paper towel’s short ends to just touch the water while the middle arches slightly.
- Optional Support: If the paper towel sags, place a small object (or example a block) between the bowls to prop up the center, keeping the towel taut for even water absorption.
- Position the Paper Towel: Hold the paper towel with colored ends facing down. Gently lower each short end into a bowl, ensuring only the bottom 0.5 inch (just below the colored bands) touches the water. The towel should form a slight U-shape or bridge.
Why This Matters: The spacing and arch allow water to travel upward via capillary action, carrying colors to form the rainbow craft. Too much submersion can tear the towel.
Tip for Kids: Before placing the towel, ask kids to predict what will happen. Will colors move? Mix? This builds anticipation and scientific thinking.

Step 4: Watch the Rainbow Craft Come to Life
Now, watch the colors climb and meet to create your rainbow craft!
- Observe the Process: As the paper towel touches the water, it absorbs it, and the water travels upward through the towel’s fibers, carrying the marker ink. Within 1–2 minutes, colors start creeping inward. In 5–10 minutes, colors from both ends meet near the top, forming a rainbow effect.
- What to Expect: Colors may blend slightly where they meet (e.g., red and orange create a gradient), but the ROYGBIV order remains visible. The towel will be wet but should hold together with a sturdy brand.
Why This Matters: This visual transformation captivates kids and demonstrates capillary action, the science behind the rainbow craft.
Tip for Kids: Encourage kids to describe what they see as the colors move. Ask, “Which color is moving fastest?” or “What happens when colors meet?” to spark discussion. For some reason my boys really wanted to stir the water because some color was lost to it. After the activity was done they used spoons to mix it into a brown color. This was an excellent learning experience as well.

Step 5: Display Your Rainbow Craft
Once the colors meet, your rainbow is complete! Turn it into a keepsake.
- Dry the Rainbow: Carefully remove the paper towel from the water and lay it flat on a dry towel or hang it to air-dry. This preserves the colors for display.
- Show It Off: Tape the dried rainbow craft to a window o pin it to an art wall. Kids love seeing their creations displayed.
- Optional Extension: Explore rainbows and prisms by reading this post next: Create Your Own Rainbow with a Prism.
Why This Matters: Displaying the rainbow craft celebrates kids’ efforts and reinforces pride in their work.
Tip for Kids: Let them choose where to hang the rainbow craft and discuss how color can brighten a room or space.

The Science Behind the Rainbow Craft
The rainbow craft introduces kids to capillary action, the process that makes this experiment work. Here’s a kid-friendly explanation, plus ways to deepen the learning:
- Capillary Action: Paper towels are made of tiny fibers that act like straws. When the towel touches water, water molecules are attracted to the fibers and “climb” upward, defying gravity. The marker ink, dissolved by the water, travels along, creating the rainbow craft effect. This is the same process plants use to pull water from roots to leaves.
- Color Movement: Water-soluble markers allow the ink to dissolve and move with the water. Each color travels at a slightly different rate, creating gradients where colors meet.
- Rainbow Science: Rainbows in nature form when light refracts through water droplets, splitting into colors. This rainbow craft mimics that by spreading colors visibly.
Teaching Tips:
- For younger kids (ages 3–6): Explain that the paper towel “drinks” the water like a straw, carrying colors to make a rainbow.
- For older kids (ages 7+): Discuss capillary action and compare it to how plants work. Introduce terms like absorption and cohesion.
- Optional Experiment: Try the rainbow craft with different paper types (for example, coffee filters) to compare absorption rates. For older kids you can let them try to do this experiment with other markers and see what happens.

Adding Music: Somewhere Over the Rainbow
To enhance the rainbow craft experience, incorporate the iconic song Somewhere Over the Rainbow by Judy Garland from The Wizard of Oz. This timeless song, with its themes of dreams and hope, complements the craft’s vibrant colors and magical feel.
- How to Use: Play or sing the song while setting up the rainbow craft to create a festive atmosphere. Alternatively, sing it as the colors meet, celebrating the rainbow’s formation.
- Why It Works: The song’s uplifting melody and rainbow imagery connect to the craft, inspiring kids to imagine their own somewhere over the rainbow.
- Extension: Have your child draw what they imagine lies over the rainbow and you can join in as well!
This musical touch adds joy and creativity to the rainbow craft, making it even more memorable.

Tips for Making the Rainbow Craft a Success
To ensure your rainbow is fun and frustration-free, follow these tips:
- Choose the Right Paper Towel: Use a sturdy, single-ply paper towel to avoid tearing. Test a small piece first if unsure.
- Use Enough Ink: Apply a thick layer of marker for vibrant colors, but don’t oversaturate to the extent of creating a hole in the towel.
- Adjust for Ages:
- Toddlers (2–4): Pre-cut the towel and use chunky markers. Focus on naming colors and watching the rainbow form.
- Kids (5–8): Let them cut and color, guiding alignment. Encourage predictions and observations.
- Older Kids (9+): Have them measure precisely, experiment with color placement or types of markers, or research capillary action.
- Prevent Spills: Place bowls on a tray or towel to catch drips. Use shallow water to minimize mess.
- Keep It Engaging: Play Somewhere Over the Rainbow or recite a poem while waiting for colors to meet. Ask kids to cheer when the rainbow forms.

Extending the Rainbow Craft Fun
Take the rainbow craft further with these ideas to deepen learning and creativity:
- Create a Rainbow Gallery: Make multiple rainbow crafts with different color patterns (for example, use only warm/cool colors or primary/secondary colors).
- Explore Color Mixing: Try a second rainbow craft using only primary colors (red, yellow, blue) to see how they blend, referencing The Usborne Big Book of Colors.
- Learn About Rainbows: Read Raindrops and Rainbows or watch a video on how rainbows form in nature, connecting to the craft’s science.
- Science Journal: Have kids draw their rainbow craft and write about the process, noting surprises or timing, inspired by When You See a Rainbow.
- Rainbow Craft Variations:
- Use coffee filters for a different texture.
- Try food coloring drops on the towel’s edges..
- Experiment with different water levels or towel sizes.
- Rainbow Storytelling: Write a story about a magical rainbow, inspired by A Rainbow of My Own, using the rainbow craft as a prop.
- Math Connection: Measure the distance each color travels or time the rainbow’s formation, introducing basic math concepts.
- Older Kiddos: Did you know Isaac Newton determined that 7 colors are in a rainbow? Encourage older kids to research why he chose the number 7, check out articles like this one from NewScientist.
Why the Rainbow Craft Matters
The rainbow craft is more than a fun activity—it’s a gateway to learning and bonding. Here’s why it’s a standout among kid activities:
- Sparks Curiosity: Kids ask questions like “Why do the colors move?” or “How does the water climb?” leading to discussions about science.
- Encourages Creativity: Coloring, displaying, and pairing with books lets kids express themselves and take pride in their work.
- Builds Family Connection: Reading rainbow-themed books, singing, and watching the rainbow form creates shared moments of wonder.
- Teaches Patience: Waiting for the colors to meet teaches kids to appreciate gradual results.
- Celebrates Beauty: The vibrant rainbow craft brightens your home, echoing the joy in The Rainbow poems.
Real-Life Impact: My boys love this activity, I was hesitant at first because I knew it would not be quick and boys don’t sit well. But boy was I surprised! They were perched on the edges of their seats the entire time. The energy of anticipation for the colors to meet at the top was serendipitous. We have shared this craft with friends and love repeating it ourselves.. It’s a low-cost, high-reward way to make learning fun.

Troubleshooting Common Rainbow Craft Issues
If your rainbow craft doesn’t go as planned, here are solutions:
- Colors Don’t Move: Ensure the towel touches the water (0.5 inch submersion) and markers are water-soluble. Test a small piece first.
- Paper Towel Tears: Use a sturdier towel or less water. Handle gently when wet.
- Colors Mix Too Much: Apply thinner color bands or space them slightly apart.
- Rainbow Takes Too Long: Shorten the towel or use less water to speed up capillary action.
- Towel Sags: Add a support under the center or use smaller bowls closer together.
Making the Rainbow Craft Inclusive
Ensure everyone can enjoy the rainbow craft with these adaptations:
- For Younger Kids: Pre-cut the towel and use chunky markers for easier grip. Focus on color recognition rather than precision.
- For Older Kids: Challenge them to experiment with variables (such as, different paper types or color patterns) or explain the science in their own words.
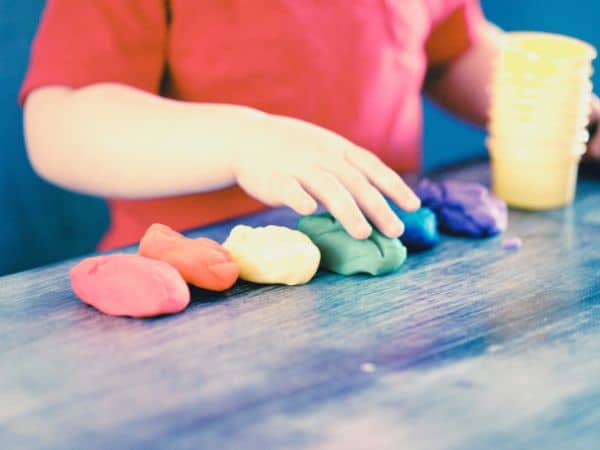
- For Kids with Motor Challenges: Set up the activity yourself and invite them to join for the anticipation step. After, bring out rainbow playdough and let them play!
Somewhere Over the Rainbow
The rainbow craft is a perfect blend of science, art, and family fun, making it an ideal indoor activity. With minimal supplies and maximum impact, this rainbow craft teaches the ROYGBIV sequence, introduces capillary action, and creates a beautiful keepsake. Whether you’re reading A Rainbow of My Own, singing Somewhere Over the Rainbow, or watching colors climb a paper towel, this rainbow craft fosters curiosity, creativity, and connection.
Get Started Today: Grab your markers, paper towel, and books, and try this rainbow craft with your family. Experiment with variations, display your creations, and share the joy of growing a rainbow. What other rainbow crafts will you explore next? Let this colorful activity brighten your day and inspire more science and art adventures!
Read Next: More Rainbow Activities for Kids.
Rainbow Craft
AT A GLANCE ACTIVITY INSTRUCTIONS
Materials
- 7 markers (ROYGBIV – red, orange, yellow, green, blue, indigo, & violet)
- Paper towel
- 2 bowls of water
Instructions
- Cut the paper towel shorter and narrower. About 2 inches off on length and 1 inch off on width.
- Color the paper towel on both short ends with the seven colors. blocked equally. The colors should also be just over an inch in. Be sure each color is across from itself.
- Once done, bring your child to the two water bowls placed apart enough that just the short edges of the paper towel will touch. You may want to place something in between to help hold up the paper towel as it soaks up the water.
- Now that you have your set up. Place the paper towel with the short edges into the water just barely touching. It will begin to soak up water and as the water is absorbed and pushed farther up the towel it will take the dye with it.
- Once the colors meet at the top you’ve created your rainbow. My kiddos like to let it dry and then hang it on their art wall.
Recent Posts on the Homeschool Blog