This post may contain affiliate links. Please refer to our disclosure policy.
Hey there, parents! If you’re looking for a super fun and engaging way to help your preschooler learn the spelling of their name while sneaking in some skill-building, you’re in the right place. Today, we’re diving into a delightful activity that’s all about making learning personal and sparkly—because who doesn’t love a bit of sparkle?
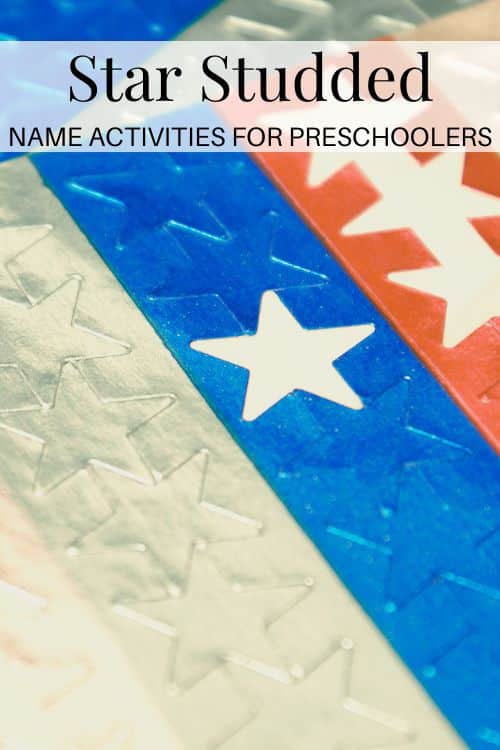
This star-studded name art project is one of those name activities for preschoolers that’s not only a blast but also packs a punch when it comes to early learning. Plus, it’s simple to set up, uses just a couple of materials, and ends with a piece of art your kiddo will be proud to show off. Let’s get into it!
Table of Contents

Why This Name Activity Rocks for Preschoolers
Kids are naturally curious about their names—it’s one of the first words they recognize and claim as their own. This activity taps into that curiosity, turning the letters of their name into a hands-on, creative adventure. It’s perfect for preschoolers, who are just starting to connect letters with sounds and meaning. By focusing on their name, you’re giving them a personal connection to literacy, which makes the whole experience feel special and relevant.
Is Your Child Learning the Alphabet?: Alphabet Wall Displays
Beyond spelling, this activity works wonders for fine-motor skills. Those little fingers will get a workout as they peel and stick shiny star stickers along the lines of their name. It’s like a mini obstacle course for their hands, helping them build the coordination they’ll need for writing, buttoning shirts, or tying shoes down the road. And the best part? It feels like pure play to them. No boring worksheets here—just a colorful, sparkly project they’ll want to dive into.
Plus, this activity is a confidence booster. When your child sees their name transformed into a glittery masterpiece, they’ll feel a sense of pride and ownership. You can hang it on the fridge or in their room, where it becomes a daily reminder of their accomplishment. It’s one of those name activities for preschoolers that leaves a lasting impression, both emotionally and educationally.

What You’ll Need
The beauty of this name activity for preschoolers is how simple it is to pull together. You probably have most of the supplies lying around the house already. Here’s what you’ll need:
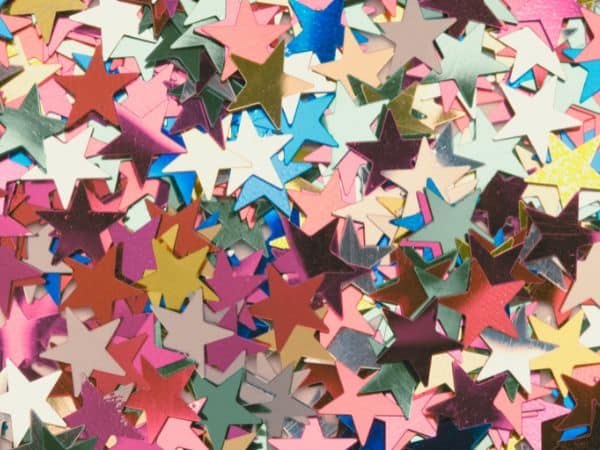
- Sticker stars: Grab a pack of shiny, colorful star stickers from the craft store, your local dollar store, or online by following the link. If you want, go bigger but not too big or the shape of the letters will be lost. Mostly, any size will do as long as they’re easy to peel. Also, consider your child’s needs. There are 3D stickers available that make it easier to peel.
- Construction paper: Let your child pick their favorite color for this name activity for preschoolers. One sheet is plenty, but have extras on hand in case they want to make one for a sibling or friend. One of my boys had the attention span to make multiple, whereas another completed the craft throughout the day.
- A marker or pen to write their name (more on that in a sec).
That’s it! No glue, no scissors, no mess. Just a couple of items, and you’re ready to roll.
How to Set It Up
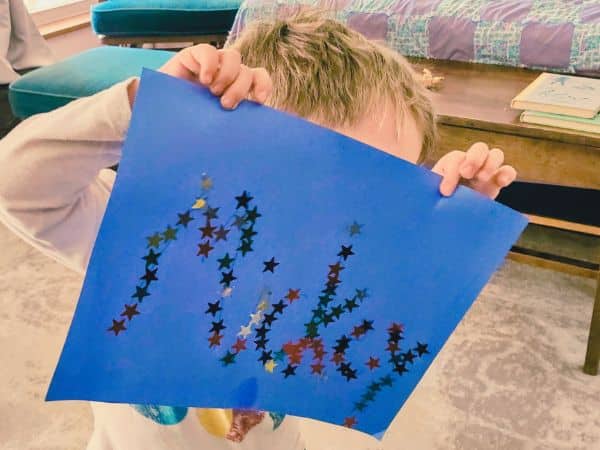
Alright, let’s get this starry show on the road. Start by grabbing a piece of construction paper—any color your child loves is perfect. Using a marker or pen, write your child’s name on the paper. Keep it medium-sized—big enough for them to see the letters clearly but not so huge that it takes a million stickers to cover. Make sure the letters are bold and distinct, especially if your kiddo is just starting to recognize them.
Also, if their name is longer, like Alexandria or Christopher, you might want to spread it across two lines or use a larger sheet of paper.
Pro tip: If your child has a nickname they go by, like “Alex” or “Chris,” you can use that instead to keep it short and sweet. Or, if they’re ready for a challenge, go for the full name and make it a bigger project. Like I said before, it can be spaced throughout the day. Either way, write it clearly and double-check the spelling (you’d be surprised how easy it is to miss a letter when you’re in a rush!).
Choosing Between Uppercase and Lowercase Letters: For this name activity, it is up to you to choose between using all uppercase letters or only capitalizing the first letter of the name. Base your decision on what your child has learned so far. If they are comfortable or only learning uppercase letters, then go all uppercase. On the other hand, if you’re teaching them uppercase and lowercase in tandem then representing their name grammatically correct is perfectly fine too!
Once the name is written, lay out the sticker stars on the table. If you’ve got a variety of colors or sizes, let your child pick their favorites—it gives them a sense of control and makes the activity even more exciting. Set the construction paper in front of them, and you’re ready to start the fun.
Let’s Get Sticking!
Now comes the part your preschooler will love: sticking those stars! Encourage them to place the stickers along the lines of the letters in their name. The goal is to cover each letter completely, turning their name into a dazzling, star-lined work of art. For younger kids, you might need to guide them a bit—point to the first letter and say, “Let’s start with the A in your name. Can you put a star right here?” As they get the hang of it, step back and let them take the lead.
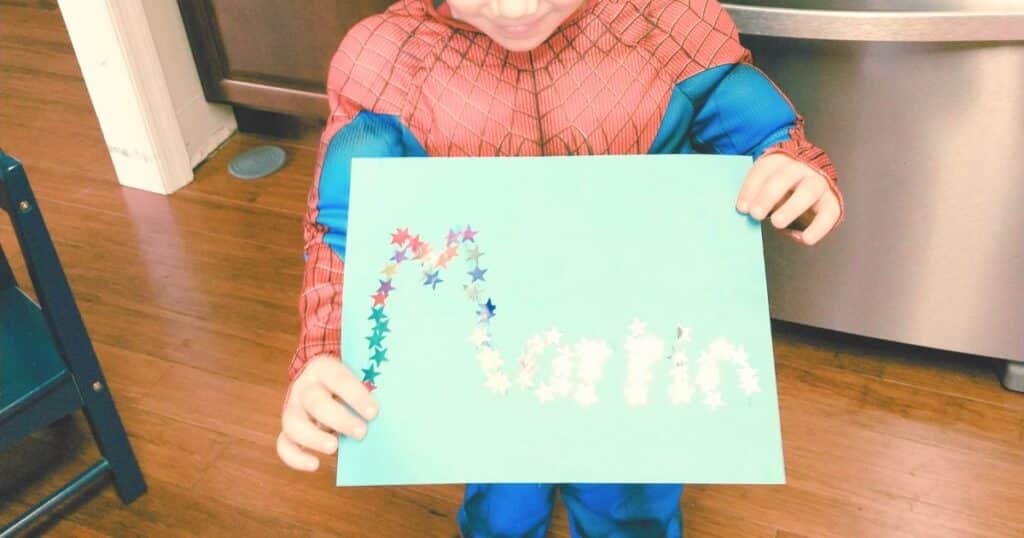
This is where the magic happens. As they place each sticker, they’re not just decorating—they’re tracing the shape of each letter, which helps them internalize its form. They might not realize it, but they’re learning the order of the letters in their name and getting familiar with how they look. For example, if their name is MARTIN, they’ll start to notice the roundness of the R or the hard points in the M and N. It’s a sneaky way to build letter recognition without making it feel like a lesson.
The fine-motor skills come into play as they peel the stickers off the sheet and carefully place them on the paper. Peeling requires precision, and sticking requires control—both are great practice for those tiny hands. If they struggle with peeling, you can help by loosening the edge of a sticker or two, but try to let them do as much as possible on their own. It’s all part of the learning process with this name activity.
Don’t worry about perfection. Some stars might end up crooked or overlap, and that’s totally fine. The goal is for your child to have fun and feel proud of their work, not to create a museum-worthy masterpiece. If they want to go wild and add extra stars around the letters or decorate the edges of the paper, let them! It’s their creation, and the more they make it their own, the more invested they’ll be.
My two rules are: 1) they must finish their name before placing stickers elsewhere, so that they do not become distracted. 2) When they finish, we still need to see their name and letters in their name distinctly. Overall, set your own rules or don’t set any at all!
Making It a Learning Moment
As you’re working together, weave in some casual learning. Talk about the letters as they go. For example, if their name is Mickey you might say, “Wow, look at that M! It’s tall and straight, isn’t it? What sound does M make?” Keep it light and playful—no need to turn it into a quiz. You can also count the stickers as they place them or ask them to pick out all the blue stars before moving to the yellow ones. These little moments add layers to the activity, helping with letter sounds, counting, and color recognition.
Read Next: Color Activities for Preschoolers
If your child is super curious, you can point out patterns in their name, like repeated letters. For instance, “Hey, look, there’s an A at the start of Ava and another one at the end!” This helps them start to see their name as a sequence of letters, which is a big step toward spelling and reading.
For kids who are a bit more advanced, you can extend the activity. After they’ve covered their name with stars, ask them to trace the letters with their finger and say the name out loud. Or, if they’re ready, have them try writing the letters themselves on a separate piece of paper. It’s a natural progression from sticking to writing, and it keeps the activity engaging for slightly older preschoolers.
Be Inspired: Handwriting with Kites Printable

Displaying the Masterpiece
Once the name for the star-studded name activity is fully covered in stars (or as covered as your child wants it to be), it’s time to show it off! Let your kiddo decide where to hang their creation. The fridge is a classic spot—those magnets will hold it up nicely, and it’s a place where everyone in the family can admire it.
Alternatively, you can tape it to their bedroom door, pin it to a bulletin board, or even frame it for a more permanent display. Wherever it goes, make a big deal out of it. Say something like, “Wow, you made your name look so sparkly! I’m so proud of you!” That kind of praise goes a long way in building their confidence.
Every time they see their starry name, it’s a reminder of their accomplishment and a chance to reinforce those letters. They might even start pointing out the letters in their name when they see them elsewhere, like on signs or in books. It’s a small activity with big ripple effects.
Get Organized: Artwork Storage Solutions
Why Name Activities for Preschoolers Matter
Names are a powerful tool in early learning. They’re often the first word a child learns to recognize, and they carry a sense of identity and belonging. Name activities like this one make learning personal and meaningful, which is key for preschoolers. When kids feel connected to what they’re learning, they’re more likely to stay engaged and retain the information.
This star-sticker name activity is just one of many name activities for preschoolers that you can try. The beauty of focusing on their name is that it’s inherently motivating—kids love anything that’s about them. Plus, it’s a low-pressure way to introduce foundational skills like letter recognition and fine-motor control. You’re not drilling them with flashcards or forcing them to sit still; you’re letting them play, create, and learn at their own pace.
Variations to Keep It Fresh
Want to mix it up? This name activity is super versatile. Here are a few ways to tweak it for more fun or to suit your child’s interests:
- Change the stickers: If stars aren’t their thing, try stickers with animals, hearts, or even their favorite cartoon characters for a similar name activity experience. The sticking process is the same, but the theme feels new. Be sure to write their name the appropriate size of the stickers so that they aren’t too overwhelmed with small stickers and a big name, or losing a small name under larger stickers.
- Use different materials: Instead of stickers, try dot markers, pom-poms, or even finger paint to trace the letters. Each material offers a different sensory experience, keeps the fine-motor practice going, and continues the name activity adventure.
- Make it a group activity: If you have more than one child, have each kid make their own name art, then compare the letters. Do any of their names share the same letters? It’s a fun way to introduce the concept of shared sounds or letters. For example, all our boys’ names begin with the letter M. It’s fun to see their eyes light up when they see they have this in common with each other.
These variations keep the name activity exciting and let you revisit it without it feeling repetitive. Plus, they give you a chance to tailor it to your child’s unique interests and developmental stage.
More Name Activities for Preschoolers
If your child loved the star-sticker name art, you’re in luck—there are tons of other name activities for preschoolers that build on the same skills while keeping things fresh and fun. Here are a few more ideas to keep the name-learning party going:
- Name Puzzle: Write your child’s name on a piece of cardstock, then cut it into strips or shapes, with one letter on each piece. Have them put the pieces back together in the right order to build their name. This is great for letter sequencing and problem-solving. For an extra challenge, mix in letters from a sibling’s name and see if they can sort them out.
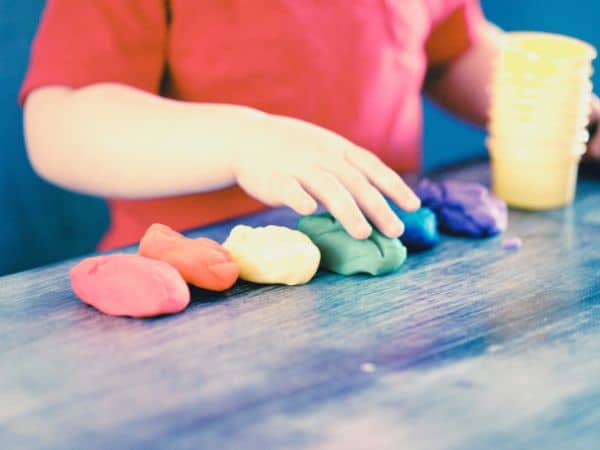
- Playdough Names: Roll out playdough into long snakes and help your child shape them into the letters of their name. This is awesome for tactile learners and doubles as a fine-motor workout. Once the name is formed, they can decorate it with beads or buttons.
- Name Scavenger Hunt: Write each letter of their name on a separate sticky note and hide them around the room. Send your child on a hunt to find the letters, then have them arrange the sticky notes in the correct order to spell their name. This gets them moving and adds an element of adventure to letter recognition.
- Singing Their Name: Make up a simple song or chant using the letters of their name. Keep it simple if you’re not musically talented like me, then point to each letter on their name activity as you sing the letter. It’s a fun way to reinforce spelling through music.
- Name Tracing Tray: Fill a shallow tray with salt, sand, or shaving cream, and write their name in it with your finger. Then, let your child trace the letters with their finger or a paintbrush. It’s a sensory-rich way to practice letter shapes and can be less intimidating than using a pencil for kids who aren’t ready to write yet. I love shaving cream! But many parents have had success with salt and sand. Personally, shaving cream is messy but so much easier to clean up then small, gritty grains. If you are interested in the sensory salt/sand trays and want to make your own, then check out this post by All About Learning Press.
These name activities are all about keeping things playful while helping your child get comfortable with their name. Mix and match them based on what your kiddo enjoys—whether they love getting messy with playdough or running around on a scavenger hunt, there’s something for every personality.
Engaging Name Activities for Preschoolers
This star-studded name activity, along with the extra name activities for preschoolers, offers a treasure trove of ways to make learning personal, fun, and meaningful. With just a piece of construction paper, some stickers, and a sprinkle of creativity, you’re helping your child master the letters in their name, build fine-motor skills, and create something they’ll be proud to show off. Add in a few of the other activities, like a name puzzle or a playdough masterpiece, and you’ve got a whole toolbox of ideas to keep the learning going.
So, grab those stickers, write your child’s name, and let them dive into the fun. Whether they’re sticking stars, hunting for letters, or singing their name, you’ll be amazed at how much they learn while having a blast. Happy creating, and enjoy watching your preschooler shine!
Recent Posts on the Homeschool Blog