BAKING SODA & VINEGAR REACTION
A volcano science experiment.
— By Julie Hodos on January 16, 2025; Updated on February 9, 2026.

This post may contain affiliate links. Please refer to our disclosure policy.
Who doesn’t love that magical moment when baking soda meets vinegar and — POOF! — you have an instant, foaming, fizzing eruption? It’s safe, it’s dramatic, and it never gets old. For decades, the baking soda and vinegar volcano science experiment has been the go-to way to bring a little “wow” into science time, and for good reason. When you turn that simple and safe chemical reaction into a mini volcano; you’re helping little ones understand a real natural phenomenon.
Table of Contents
This may be the nostalgic volcano science experiment we all did in school, but it’s still one of the very best ways to introduce preschoolers and early elementary kids to basic chemistry, geology, and the sheer power of nature — all while keeping everything 100% safe and backyard-friendly.
Ready for an eruption of fun? Let’s dive in!
Why Teaching About Volcanoes Matters
Most young kiddos have zero real-life reference for what a volcano actually is. They might have heard the word, played “the floor is lava,” or seen a cartoon volcano spit animated lava, but the idea of liquid rock bursting out of a mountain? That’s mind-blowing — and a little scary if you don’t prepare them properly. Without some background, the experiment might just feel like a fun fizzy mess without any deeper connection to the real world. This is why it’s beneficial to create a lesson around volcanoes when conducting this experiment.
Taking just 10–15 minutes to front-load volcano knowledge does three huge things for your little learners: First, it builds excitement and anticipation (“We’re going to make our own volcano erupt just like the real ones!!”). Second, it reduces any potential fear or hesitation — they’ll understand that our homemade lava is cool, safe, and nothing like the super-hot molten rock that comes from actual volcanoes. And third, it provides essential context so the activity feels like genuine science exploration rather than just a random craft project.
The pre-loading turns a simple reaction into an educational adventure, helping kids make those all-important connections between what they see in books or videos and what happens right in front of them during the experiment. You can do this in so many ways, but I always start with something visual and engaging to hook their attention right away. Think of it as setting the stage for the main event — the more vivid the introduction, the more memorable the whole science experience becomes.
Our Favorite Preschool Volcano Books
Books are hands-down my favorite way to introduce big, exciting concepts like volcanoes to kids. There’s something magical about flipping through colorful pages together, pointing out details, and letting their imaginations run wild. Plus, reading aloud builds vocabulary, sparks questions, and creates those cozy bonding moments. For volcanoes, I focus on stories that are age-appropriate — nothing too scary or overwhelming — with beautiful illustrations that capture the drama without the danger.
Here are the ones my kids request over and over again, and why they work so well:
- Volcano Dreams: A Story of Yellowstone by Janet Fox – This book is like a gentle lullaby about the massive supervolcano sleeping under Yellowstone National Park. It weaves in facts about how volcanoes form from underground heat and pressure, but in a dreamy, poetic way that feels more like a bedtime story than a lesson. The illustrations are stunning, with soft colors showing animals living peacefully around the “sleeping giant.” It’s perfect for easing kids into the idea that volcanoes can be both powerful and part of the natural world. We love discussing what might happen if the volcano “wakes up,” which leads right into talking about eruptions.
- Gopher to the Rescue! A Volcano Recovery Story by Terry Jennings – Based on the real eruption of Mount St. Helens, this book shifts the focus to what happens after a volcano erupts. It follows a little gopher and other animals as they return to the ash-covered landscape and watch new life sprout up. It’s an uplifting take on volcanoes’ impact, showing how eruptions can destroy but also create fertile soil for plants to grow stronger. The real photos mixed with illustrations make it feel authentic, and it’s great for teaching resilience and environmental recovery. My boys especially love spotting the animals and imagining themselves as little explorers in the story.
- The Magic School Bus Blows Its Top by Anne Capeci – If your preschooler is ready for a bit more adventure (or if you have older siblings joining in), this chapter book from the beloved series is a hit. Ms. Frizzle takes her class on a wild ride to build a volcano from scratch, explaining plate tectonics, magma, and lava along the way. It’s packed with fun facts but keeps the tone light and humorous. We read it in short bursts, pausing to act out scenes, which really helps solidify the concepts.
- National Geographic Kids Volcanoes! (Level 2 Reader) – For kids who love real photos and quick facts, this is ideal. Short, simple sentences cover how volcanoes form, different types (like shield vs. composite), and famous ones around the world. The close-up images of lava flows and eruptions are awe-inspiring without being frightening. It’s a great confidence-builder for emerging readers, and we use it as a reference to point out similarities during our experiment.
- If You Should Hear a Honey Bee by Mary Einsworth – Okay, this one isn’t exclusively about volcanoes, but it has an excellent section on the Mount St. Helens eruption and its effects on wildlife. It’s a broader nature book, but the volcano part ties in beautifully, showing how bees and other insects help ecosystems recover post-eruption. The whimsical illustrations make it fun, and it’s a subtle way to introduce biodiversity alongside volcano science.
Pro tip: Head to your local library the week you plan to do the volcano science experiment. Grab a stack of these books, snuggle up with some popcorn, and let the questions flow. You’ll be amazed at how much they absorb — and how eager they’ll be to “erupt” their own volcano afterward!
Kid-Friendly Volcano Videos
Sometimes, even the best books can’t fully capture the raw power and spectacle of a real volcano erupting — that’s where short, kid-safe videos come in. Videos add movement, sound, and real-world footage that brings the concept to life in a way static pages just can’t. I keep them brief (under 10 minutes) to hold short attention spans, and I always preview them to ensure there’s no overly dramatic or scary content. The goal is to inspire awe, not create nightmares!
These are our go-to YouTube picks that are educational, engaging, and perfectly pitched for preschoolers:
- “Volcanoes for Kids” by Learn Bright (about 10 minutes) – This video starts with the basics: What is a volcano? How do they form? It uses simple animations to show Earth’s layers, magma rising, and eruptions happening. Then it transitions to safe, real footage of volcanoes like Hawaii’s Kilauea, with slow lava flows that look mesmerizing rather than dangerous. It ends with fun facts, like how volcanoes create new islands. My kids love the cartoon host who asks questions along the way — it feels interactive!
- “How Volcanoes Work” by SciShow Kids (around 5 minutes) – Super short and snappy, this one explains the science with everyday examples, like comparing magma to hot soup bubbling up. The host is energetic and friendly, using props and drawings to keep it light. It covers types of eruptions (gentle vs. explosive) without getting too technical, and the real clips are edited to be exciting but not intense.
- Slow-Motion Volcano Eruption Clips from National Geographic Kids (various short clips, 1–3 minutes each) – These are gold for showing the “money shot” — lava spewing in ultra-slow motion. No narration needed; just watch the red-hot flow and talk about what you see. It’s hypnotic and helps kids visualize what our baking soda “lava” is mimicking.
But here’s the real challenge: Once the screen is on, getting kids to turn it off can lead to epic meltdowns! My hack? Have a seamless transition ready. Right after the video, blast The Floor Is Lava song by The Kiboomers. Turn your living room into an instant game: Scatter pillows, blankets, and cushions as “safe islands,” and challenge everyone to hop around without touching the “lava” floor. I usually just play the audio version — my kiddos are none the wiser that there’s a video component, and it keeps the energy high without more screen time. It’s a fantastic way to burn off excitement, reinforce the volcano theme physically, and avoid any post-video tantrums.
The Classic Baking Soda & Vinegar Volcano Science Experiment
Materials You’ll Actually Need
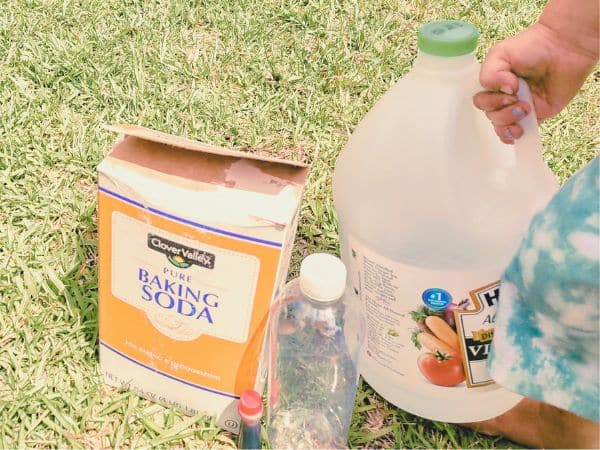
Let’s keep it simple — this volcano science experiment uses everyday pantry staples, so you probably already have most of what you need. The bare minimum setup is super budget-friendly and easy to grab at any grocery store. Here’s the list:
- An empty plastic bottle (a 16–20 oz water or soda bottle is ideal because it’s sturdy and has a narrow neck for dramatic eruptions)
- Baking soda (grab a fresh box; you’ll use about 2–3 tablespoons per eruption, but having extra lets you experiment with ratios)
- White vinegar (one standard bottle should do for multiple runs, but get two if your kids are eruption enthusiasts like mine)
- Red or orange food coloring (liquid works best for mixing evenly; 5–10 drops give that classic lava look)
- Dish soap (just a squirt of any brand — this is the secret to thick, bubbly, slow-flowing lava that mimics real molten rock)
- A tray, baking sheet, or piece of cardboard (to contain the mess and make cleanup a breeze)
- A funnel (optional, but it prevents spills when pouring vinegar and makes kids feel like pros)
That’s it for the essentials! If you want to fancy it up, you can add play dough or modeling clay to build a volcano shape around the bottle, but it’s not required for the reaction to work.
Optional “Mad Scientist” Gear (But Seriously So Much Fun)
To really amp up the excitement and teach lab safety habits early, deck out your little scientists with some gear. It transforms the activity from a backyard playtime into a full-on laboratory experience, and kids absolutely eat it up. Here’s what we use:
- Kid-sized safety goggles (cheap ones from the dollar store or online — they protect eyes from any unexpected splashes)
- Disposable gloves (latex-free for allergies; these keep hands clean and add to the “professional” vibe)
- Lab coats (an oversized adult button-down shirt worn backward works perfectly, or grab play ones from a costume set)
- Play hard hats or even paper chef hats labeled “Volcano Expert”
I’ve done this experiment with full gear, partial, and none at all, but the full setup is my favorite. It helps kids step into the role of a real scientist, practicing things like “always wear goggles when mixing chemicals.” My boys take it so seriously — they even narrate their actions like “Now, adding the activator!” It’s adorable and educational.
Set-Up Tips & Tricks (5 Minutes Max)
Setting up is quick and straightforward, but a few practical tips make it smoother and safer. First, always do this outside to avoid indoor messes — your driveway, backyard deck, a patch of dirt, or even a sensory table works great. If you’re on grass, pick a spot you don’t mind turning a bit brown (vinegar can act as a natural weed killer).
Start by placing your plastic bottle upright on the tray or directly on the ground for stability. If you want a more realistic volcano, spend a couple of minutes molding play dough, clay, or even wet sand and rocks around the bottle to form a mountain shape. Just leave the top open wide enough for easy access — no need for perfection; lumpy volcanoes are the most fun!
Next, use the funnel to pour white vinegar into the bottle until it’s about ⅔ to ¾ full. This gives plenty of room for the reaction without overflowing too wildly right away. Add 5–10 drops of red food coloring for that fiery lava hue, and don’t forget a generous squirt (1–2 teaspoons) of dish soap — it traps the gas bubbles, creating thicker, more dramatic foam. Give it a gentle swirl to mix without creating bubbles prematurely.
Finally, prepare your baking soda station: Measure out 2–3 tablespoons into a small bowl or cup, and hand your child a spoon. Set everything up in a clear, open space where everyone can stand back safely. Pro tip: If it’s a windy day, position the volcano so the “lava” flows away from your audience!
Let’s Erupt!
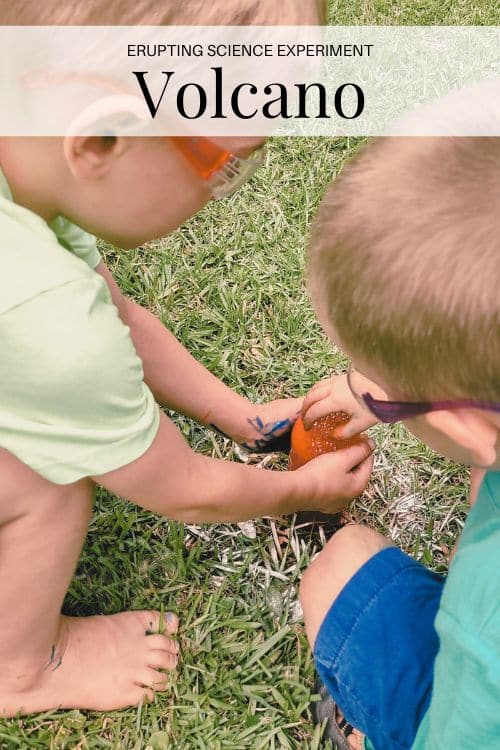
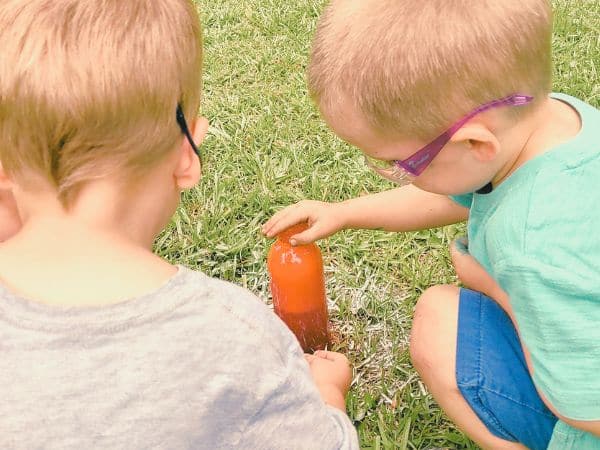
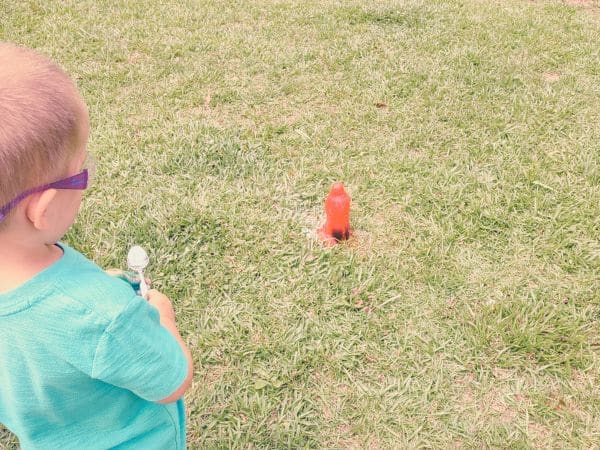
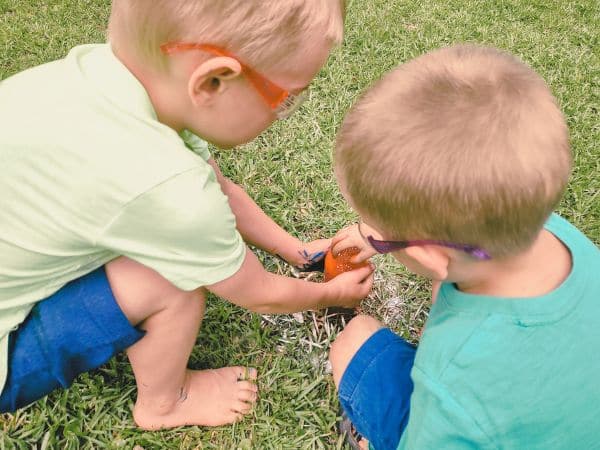
Now for the main event — the eruption! This is where the magic happens, and it’s so satisfying to watch. Have your child (in full scientist gear, of course) stand at a safe distance, spoon in hand. Let them dump the entire 2–3 tablespoons of baking soda into the bottle all at once. Then, quickly step back together and observe!
The reaction kicks off immediately: The vinegar (an acid) and baking soda (a base) mix to produce carbon dioxide gas, which gets caught in the dish soap, forming a rush of red, foamy “lava” that bubbles up and spills over the sides. It fizzes, pops, and flows just like a mini version of a real volcanic eruption. The first time, my boys froze in awe, imagining it was real hot lava — probably from those videos we watched! But once they realized it was harmless (and a bit messy), they dove right in, wanting to try it again and again.
Encourage repeats! This is a great opportunity to tweak variables like adding more baking soda for a bigger foam or less vinegar for a slower build-up. Just rinse the bottle between runs if needed, and supervise closely to prevent tipping or sibling squabbles. It can get slippery and vinegary, so keep towels handy. And remember, if you’re on grass, that spot might turn yellow — but hey, it’s a small price for science!
Variations to Keep It Fresh (Because They Will Want to Do It 47 Times)
The beauty of this volcano science experiment is its endless tweakability. Once the basic eruption loses its novelty (after the 10th time, maybe?), mix it up to keep the learning going. Here are some tried-and-true variations my family loves:
- Ratio Experiments: Start with the standard (½ cup vinegar + 2 tablespoons baking soda), then try extremes. More vinegar and less baking soda creates a tall, fast-shooting geyser-like eruption. Flip it for a slow, oozing lava flow. Chart the results on paper — it’s sneaky math practice!
- Colorful Twists: Swap red food coloring for yellow and blue to make “toxic gas” volcanoes, or add glitter to the vinegar for sparkly, magical lava. For a rainbow effect, layer different colors in the bottle before adding baking soda.
- Alternative Acids: Run out of vinegar? Use lemon juice or citric acid powder dissolved in water for a citrus-scented version. It reacts similarly but adds a fresh smell — perfect for indoor adaptations if you must.
- Themed Add-Ins: Drop small plastic dinosaurs or toy figures into the bottle first, then “rescue” them from the erupting lava. Or freeze vinegar with food coloring in ice cube trays overnight; drop the “vinegar bombs” into a baking soda-filled bottle for a delayed, melting reaction.
- Giant Scale: Use a 2-liter soda bottle for mega eruptions, or connect multiple small bottles with tubes for a “volcano chain.”
These tweaks turn one activity into hours of exploration, teaching trial-and-error, observation, and hypothesis-testing without even trying.
Troubleshooting Common Volcano Problems
Even the simplest experiments can have hiccups, but don’t worry — most are easy fixes. If your eruption is lackluster (“It barely fizzed!”), check your ratios: You need at least ½ cup vinegar and 2 heaping tablespoons of fresh baking soda. Old baking soda loses potency, so test it first by mixing a bit with vinegar in a cup.
If the bottle keeps tipping over during the excitement, bury the bottom third in sand or dirt, or tape it securely to your tray. For that overpowering vinegar smell, add a few drops of essential oil (like peppermint or lavender) to the mix beforehand — it masks the odor without affecting the reaction.
And if you end up with a big red stain on the grass? Vinegar is acidic and can kill patches of lawn, so always choose your spot wisely or stick to pavement. If it happens, just reseed later — consider it a teachable moment about chemical impacts on the environment!
The Simple Science – Explained for Little Kids (and Curious Parents)
At its core, this volcano science experiment demonstrates a classic acid-base reaction. Baking soda (sodium bicarbonate, a base) combines with vinegar (acetic acid) to produce water, salt, and carbon dioxide gas — that’s the fizzing bubbles you see and hear. The dish soap traps those gas bubbles, turning them into thick foam that mimics flowing lava.
For kids, explain it like this: “Imagine the vinegar is like grumpy underground rocks, and baking soda is the spark that wakes them up. They argue and create bubbly gas, just like when you shake a soda bottle!” Tie it back to real volcanoes: Deep in Earth, heat and pressure build until magma (molten rock) bursts out, driven by gases like our carbon dioxide. It’s not identical, but it shows how pressure and reactions can cause dramatic “explosions.” Older preschoolers might even draw parallels to burping after drinking fizzy drinks!
Clean-Up Hacks
Cleanup doesn’t have to be a chore — with these tips, you’ll be done in minutes. Right after the last eruption, rinse the bottle, tray, and any gear with a garden hose to wash away residue before it dries. For stubborn food coloring stains, sprinkle baking soda on wet spots and scrub gently; it acts as a natural abrasive.
Neutralize lingering vinegar smells by scattering leftover baking soda over puddles — it fizzes away the acid. Toss disposable items like used play dough straight into the trash or compost bin (it’s biodegradable!). For clothes or skin splatters, a quick wash with soap and water does the trick. Pro tip: Lay down old newspapers or a tarp beforehand for even easier disposal.
Turn It Into an Entire Week of Volcano Learning
Because one eruption is never enough, stretch the fun into a full week of themed lessons tailored for 3–5-year-olds. This relaxed homeschool-style plan builds knowledge layer by layer, mixing reading, hands-on activities, and play. It’s flexible — skip days or adapt as needed — and keeps everything light and enjoyable.
Day 1 – What Is a Volcano?
Kick off with books and videos to build basics. Read Volcano Dreams and Gopher to the Rescue, then watch a short clip. End with The Floor Is Lava game to get wiggles out. Focus: Introduce terms like “eruption,” “lava,” and “crater.”
Day 2 – Build & Erupt Your Volcano
Hands-on day! Do the classic baking soda and vinegar experiment, trying variations. Discuss observations: “What made it fizz? How does it look like real lava?”
Day 3 – Volcano Art Day
Get creative with stamping, collages (torn red paper as lava on black construction paper mountains), and coffee filter “fire” art (draw with markers, spritz water to blend colors). Talk about volcanic colors and shapes.
Day 4 – Pompeii & Volcano Safety
Gently introduce history with a preschool-friendly Pompeii book (like ones focusing on artifacts, not tragedy). Discuss safety: “Scientists watch volcanoes and tell people when to move to safe spots — like an adventure!” Play evacuation games.
Day 5 – How Volcanoes Help the Earth
Explore positives: Plant quick-sprouting beans in pots with regular soil vs. one mixed with wood ash (simulating volcanic soil). Watch growth over days. Read about how eruptions create new land and fertile farms. Wrap with a “volcano party” reviewing favorites.
This structure makes learning feel like play, with built-in repetition for retention.
Your Turn!
Have you tried the baking soda and vinegar volcano science experiment at home? Did you theme it around real volcanoes, or keep it simple? Was it a backyard blast or an indoor adaptation? Share your stories, tips, and even photos in the comments below — I love hearing from the Playing for Hours community, and your ideas inspire us all. What variations made your kids light up? Let’s keep the conversation erupting!
Here’s to safe, foamy, ridiculously fun science in your backyard today.
Happy erupting! 🌋


Volcano Science Experiment
AT A GLANCE ACTIVITY INSTRUCTIONS
Materials
- White vinegar
- Baking Soda
- Red food coloring
- Disposable water bottle
Instructions
- Firstly, begin by filling the bottle to ¾ with vinegar.
- Add 2-3 drops of food coloring.
- Now, using a tablespoon. Drop 1-2 tablespoons of baking soda into the bottle.
- Lastly, plan to try it a few times. Ask your child to help you modify the experiment for the biggest reaction.
Recent Posts on the Blog