


This post may contain affiliate links. Please refer to our disclosure policy.
Leaf art is the perfect activity to engage children with nature’s beauty while crafting memorable keepsakes. Picture vibrant red, orange, and golden leaves waiting to be transformed into splendid artwork. This isn’t merely crafting—it’s an outdoor adventure, a subtle science lesson, and an opportunity for young imaginations to soar. Whether you have little ones who adore hands-on play or older children ready for intricate designs, this comprehensive guide to leaf art is here to inspire.
Table of Contents

We’ll explore why leaf art is wonderful, discuss various types of leaves to collect, and guide you through a nature walk to begin. I have highlighted my favorite art activity that requires leaves, leaf rubbing, so that you can try it with your child. Leaf rubbing is simple, easy, and has no mess, which is why I love it so much! It’s definitely a success for the kids and myself.
I’ve also included eight additional leaf-inspired activities, plus delightful books to share with your little one and nurture a love and appreciation for God’s creation. So, gather your walking shoes and a basket—nature holds endless possibilities for creativity!
Why Leaf Art is a Splendid Choice for Children
Leaf art is like a treasure chest of activities—enjoyable, affordable, and brimming with benefits. First and foremost, it encourages children to venture outdoors. In a world often filled with screens, a stroll through a park or garden is a breath of fresh air. Children can run, explore, and become little adventurers seeking out leaves—a true nature treasure hunt!
There’s more to it, though: leaf art cleverly weaves in learning. Children discover leaf shapes, veins, and the science behind autumn’s brilliant colors. They’ll strengthen fine motor skills through cutting, gluing, or painting, and for younger ones, it’s a sensory delight—crisp leaves, earthy scents, and all. It’s also kind to the earth (most of the activities use free, natural materials) and are adaptable for all ages. Toddlers revel in the mess, while older children can create detailed designs.
Best of all, leaf art fosters confidence. There’s no wrong way to create—each leaf is unique, just like every child. Nature-based crafts can calm children and enhance focus, I know I feel that way when in the great outdoors. It’s a triumph for their minds, your budget, and the environment. Let’s begin by learning about the leaves you’ll collect!
Exploring Different Types of Leaves
Before you set out, let’s discover the leaves you’ll gather—each type offers something special for your projects. This guide only focuses on tree varieties but my boys will pick grape vine leaves and from bushes. Be sure to read the safety disclaimer when it comes to leaf hunting. Lastly, this is not an extensive list. A very common tree in our region is the sweetgum but I am not including it here because it’s not found as widely throughout North America as these others. Now, let’s get into common leaves and their crafting potential:
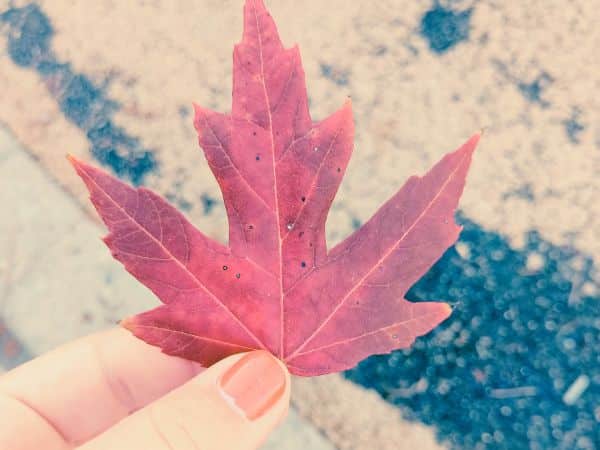
- Maple Leaves: These are the stars of leaf art with their star-shaped, pointed lobes. Flat and veiny, they’re perfect for rubbings or collages. In autumn they turn vivid red, orange, or yellow which makes them great for art projects that display the leaves.
- Oak Leaves: Known for curvy, lobed edges, oak leaves are sturdy, ideal for paint stamping or mobiles. Varieties like white oak (rounded lobes) or red oak (pointed tips) add a rustic red or brown hue in fall.
- Birch Leaves: Small, heart-shaped, and serrated, birch leaves are delicate yet splendid for suncatchers or bookmarks, with bright yellow fall colors.
- Sycamore Leaves: Broad and slightly fuzzy, sycamore leaves suit larger projects like garlands, with earthy brown and green tones.
- Aspen Leaves: The round or oval shaped leaves turn a vibrant yellow or an interesting blend of red, orange and yellow in the fall. The edges can be smooth or toothed.
- Evergreen Needles: From pine or spruce, these leaves add texture to collages or garlands, staying green year-round for contrast.
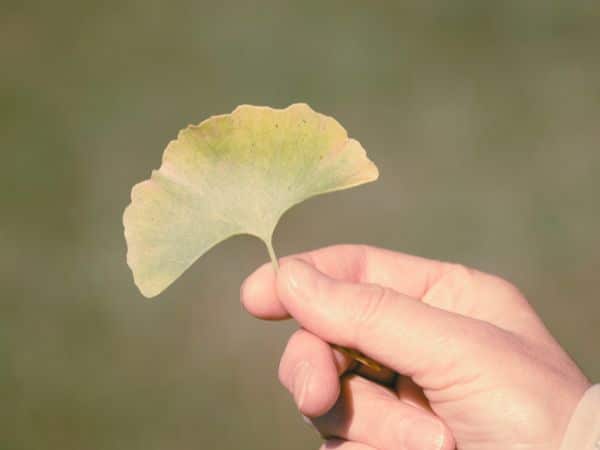
- Ginkgo Leaves: Fan-shaped and unique, ginkgo leaves turn golden in fall, perfect for bookmarks or mobiles due to their soft texture.
- Fern Fronds: These feathery leaves create intricate patterns in rubbings. Green even in autumn, they add a delicate touch to collages.
Collect a variety for fun: flat, veiny leaves like maple or fern for rubbings, thicker ones like oak or sycamore for stamping. Avoid waxy leaves like holly for rubbings, as they don’t transfer well. Point out differences to children: “See those pointed maple edges?” It’s a small science lesson that makes collecting exciting. If unsure about a tree, I love Google Lens. Additionally, if you’re interested in further tree identification information the Arbor Day Foundation has a great guide.
Leaf Hunt: Your First Step to Creative Fun
Now that you know your leaves, it’s time to collect them! Plan a family outing to a park, forest trail, or your neighborhood. Autumn is ideal for colorful leaves, but spring or summer leaves work beautifully too.
Prepare with comfortable shoes, weather-appropriate clothing, and perhaps bug spray (nature can be itchy). Use a basket or paper bag. Excite your child with a leaf quest and watch their enthusiasm grow. Seek variety based on your leaf knowledge and name trees as you go—“Look at that oak’s curved leaves!”
Make it playful! Offer a scavenger list: “Find a red maple leaf, a large sycamore leaf, or a fern frond.” It keeps children engaged and curious. Collect extras, as some leaves may break. You have two options when you get home and it ultimately depends on your intentions with the leaves. If you’re planning to do the leaf rubbing or leaf stamping then sealing them in an airtight plastic bag will keep them from drying out. Other projects that require the leaf to remain as part of the art can be pressed between books using wax paper for a few days. Now, let’s enjoy my favorite activity: leaf rubbing!
Disclaimer: Keep safety first by steering clear of low lying plants and vines. This will help you avoid poison ivy. I suggest looking up pictures of poison ivy, poison oak, and poison sumac, if you live in North America, beforehand. Know which ones are in your area and if in doubt avoid them. Lastly, always remember: “leaves of three, let it be” and wash hands afterward.
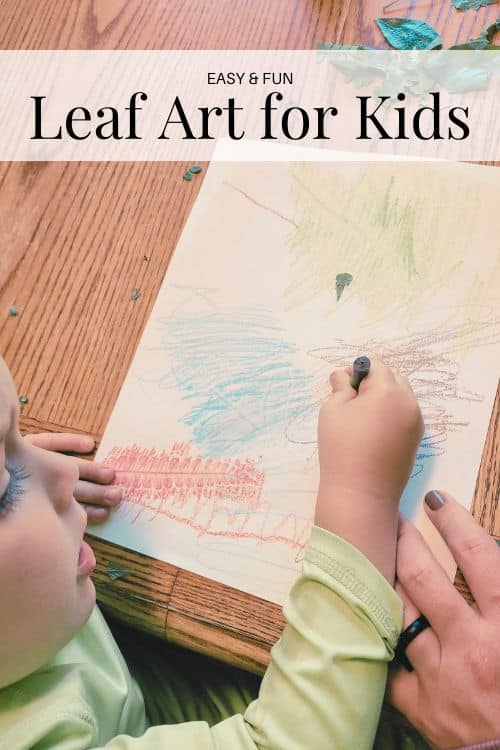
Leaf Rubbing is the Perfect Leaf Art for Kids
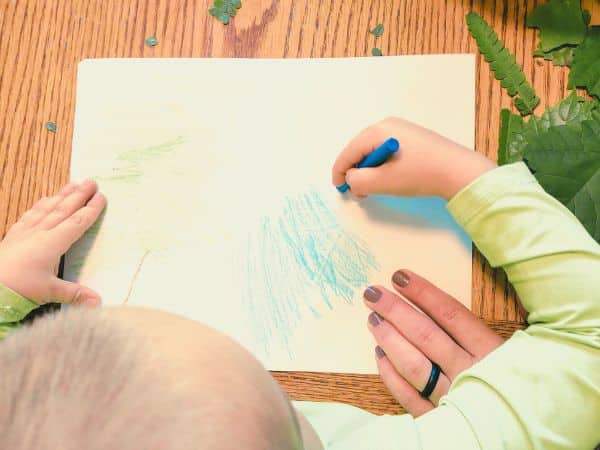
Leaf rubbing is a marvelous leaf art activity—simple, delightful, and perfect for children aged 3 and up. Place a leaf under paper, rub with a crayon, and watch the leaf’s veins and edges appear like a hidden picture. It’s like giving children a glimpse into plant secrets, revealing leaf structure (maple veins shine here!) while creating art worthy of display. We’re including a nature walk to make it a grand adventure. Here’s an easy way to do it:
Get everyone excited for a “leaf treasure hunt.” Choose a leafy place—park, trail, or your garden. Wear weather-ready clothes and bring a bag for collecting. Look for flat, veiny leaves like maple or fern, ideal for rubbings, and skip thick, waxy ones like holly for this specific project. Spend 20-30 minutes exploring, talking about trees (“That’s a grand sycamore!”). Gather 10-20 leaves per child and sort them at home, discarding any too damaged by picking or bugs.
At home, gather your supplies: fresh leaves are best (maple, fern, or birch are excellent), white printer paper and crayons (peel them for side-rubbing—old ones are fine), tape (masking tape is good because it can be removed relatively easily), or clips to secure paper, a flat surface like a table or clipboard, and perhaps colored pencils for added touches. Set up in a bright area, and for young children, peel crayons in advance to keep things smooth and again to keep that mess minimal.
Choose your crayon colors—here’s where the fun begins! Pick shades that stand out on your paper—dark colors like blue or purple work well. Try autumn hues like red, brown, or orange for maple leaves, or mix colors for a rainbow effect. Show children how contrasting colors (like red on green birch leaves) make designs pop. Let them test colors on scrap paper to choose favorites.
Place a leaf vein-side up on your surface—those veins create the magic. Arrange a few for a pattern or start with one. Lay paper over the leaf and hold it firmly—movement can blur the rubbing. For active children, tape the paper’s edges. Explain that a steady hand and firm press makes clear rubbings.
Take a peeled crayon, hold it sideways, and rub gently but firmly over the paper. Start in the center and move outward, watching the leaf’s details appear. Rub for a minute or two until it’s clear. Add more colors for extra charm.
Lift the paper—there it is! Your leaf rubbing is a treasure. Add marker details, cut it into shapes, or frame it for a special gift. For toddlers, use large crayons and assist with holding. An older child can have a plan going into the leaf rubbing (such as, making a leaf man or planning out a pattern of colors and leaves). Their scenes can be creative and more informed than simply revealing the texture. To keep the science element flowing consider adding this to an older child’s nature journal, label rubbings with tree names (like Red Maple).
This activity takes about 30-45 minutes and creates art that doubles as a plant lesson. Ready for more? Here are eight other leaf art ideas to keep the creativity flowing!

Eight More Leaf Art Ideas to Keep the Fun Going
Leaf rubbing is just the beginning—here are eight more ways to transform leaves into splendid creations. Each includes a brief description and what you’ll need. Let’s dive in!
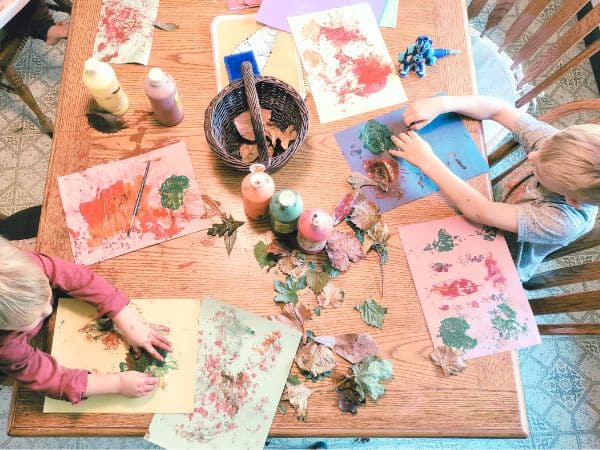
- Paint Stamping with Leaves
Use leaves as stamps to create vibrant prints. Dip sturdy oak or sycamore leaves in paint, press onto paper, and make patterns or abstract art—joyful and great for exploring symmetry.
Materials: Leaves of different size and shape found on a leaf hunt, washable paints, paper, brushes, plates for paint. - Leaf Collages check out the how to by The Imagination Tree
Glue leaves (try ginkgo or birch) onto paper to craft scenes like forests or faces. It’s storytelling through art, ideal for young artists.
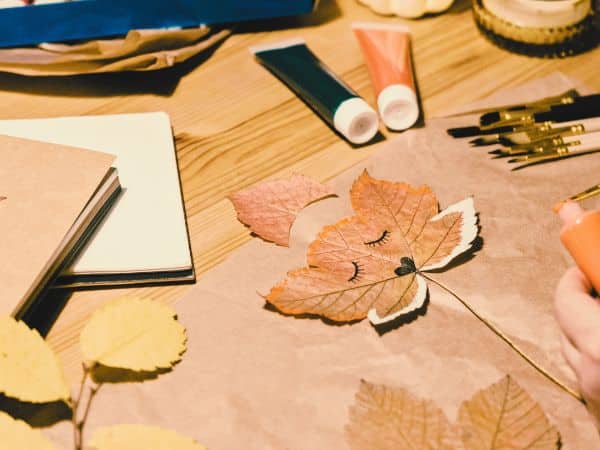
Materials: Leaves, glue sticks, construction paper, scissors (optional). - Leaf Critters
Turn leaves into whimsical animals with googly eyes and pipe cleaner legs—maple leaves make splendid lion manes! It’s pure imaginative fun.
Materials: Leaves, googly eyes, pipe cleaners, markers, glue, cardstock. - Leaf Ink Prints
Coat leaves (fern fronds are excellent) with ink and press for mirrored prints, like miniature block printing. It highlights leaf details in a fresh way.
Materials: Leaves, stamp pads/ink rollers, paper, newspapers. - Leaf Mobiles from Laura Radnieki
String leaves (birch or ginkgo are lovely) into a hanging mobile that dances in the breeze. It’s a three-dimensional nature sculpture children adore. To make sure these leaves do not curl up from drying out, plan to press them and consider preserving them in wax.
Materials: Leaves, string/fishing line, sticks or hoops, hole punch, beads (optional). - Leaf Bookmarks
Laminate leaves (ginkgo’s fan shape is charming) for durable, personalized bookmarks. Add drawings or quotes for extra flair.
Materials: Leaves, contact paper/laminator sheets, scissors, markers. - Leaf Suncatchers from The Seasoned Mom
Sandwich leaves (birch or fern are ideal) and crayon shavings between wax paper, iron to melt (adults only), and hang for glowing window art.
Materials: Leaves, wax paper, iron, crayon shavings, string. - Leaf Garlands from Weave In Wonder
Weave flexible leaves (like willow) into chains or garlands for festive decor. It teaches weaving and looks splendid.
Materials: Flexible leaves, string/yarn, blunt needles, tape.
Try these for hours of enjoyment—begin simply, then explore more!
Read Next: Leaf Crafts for Preschoolers
Tips and Tricks for Preserving and Displaying Your Leaf Art Creations
Once your children have created their leafy masterpieces, you’ll want to keep them looking splendid for as long as possible and show them off proudly! Here are some practical tips for preserving and displaying leaf art to make those creations last and shine. Some of the tricks should be completed before crafting so be sure to read this before going out on your nature walk adventure.
- Pressing Leaves for Longevity: To keep leaves vibrant, press them before crafting. Place leaves between sheets of newspaper or parchment paper, then tuck them inside a heavy book or use a flower press for 3-7 days to flatten and dry them, preventing curling or crumbling.
- Sealing for Protection: For collages or critters, apply a thin layer of clear glue or Mod Podge over leaves to seal them (some people prefer wax but that is not suitable for these specific leaf art projects because the wax will not let the glue adhere as well for a collage or critter). This helps preserve color and strength, especially for delicate leaves like birch or fern.
- Laminating for Durability: Use clear contact paper or a laminator for bookmarks or suncatchers to protect leaves from tearing. Trim edges neatly and punch a hole for a ribbon to add a charming touch.
- Framing Your Favorites: Showcase rubbings or collages in simple frames or on a bulletin board for a gallery feel. Use acid-free paper as a backing to prevent fading over time.
- Storing Properly: For the finished project, store the leaf art in a dry, cool place, like a flat box or folder, to avoid moisture damage. Avoid direct sunlight to keep colors from fading. Consider taking a snapshot with your child holding it so that as it fades or crumbles over time the memory and lessons are preserved.
- Creative Display Ideas: Hang mobiles or garlands from ceilings or windows for a whimsical effect, or create a seasonal art wall with string and clothespins to rotate creations. This is one of my methods for art storage, read about it by following the link.
These tips ensure your children’s leaf art stays beautiful and becomes a cherished keepsake, perfect for admiring or gifting to loved ones!

Safety and Cleanup Tips
To keep your leaf art adventures safe and tidy, a little preparation goes a long way! Here are some practical tips to ensure children enjoy crafting while keeping messes manageable and everyone safe:
- Safe Leaf Selection: Teach children to avoid toxic plants like poison ivy or poison oak—remember, “leaves of three, let it be.” If unsure, use a plant ID app or guidebook to check leaves before collecting.
- Clean Hands, Clean Fun: Wash hands after collecting leaves to remove dirt, sap, or potential irritants. Keep hand sanitizer or baby wipes handy for outdoor outings if soap isn’t available.
- Supervise Little Crafters: For young children, use non-toxic, washable materials for safety (such as, tempera paint – follow the link to read more about paint selection).
- Protect Surfaces: Cover tables with newspaper or a washable tablecloth before starting, especially for paint stamping or ink printing. This makes cleanup a breeze and protects furniture.
- Manage Messy Materials: For paint-based activities like stamping, use plates or trays to contain paint and have wet wipes or a damp cloth nearby for quick cleanups.
- Dry and Store Smartly: After crafting, let wet projects (like paint-stamped art) dry flat to avoid smudging. Store unused leaves in a dry, cool place to prevent mold or discard in the compost if all finished.
These tips help keep your leaf art sessions safe, fun, and stress-free, letting everyone focus on creating beautiful nature-inspired artwork!
6 Lovely Books to Inspire Leafy Learning
Books are wonderful companions for leaf art, sparking inspiration and offering gentle lessons in types of leaves and the changing of the seasons. Here are seven charming picks for children (ages 3 and up) about leaves, seasons, and nature. Consider looking for them at your local library or adding them to your own personal library. Many books I fell in love with after checking out of our local library that I made sure to add when the time was right to our children’s library at home. It’s very special seeing my boys leafing through these curated books on any given day simply studying the pictures since they can’t read yet.
- We’re Going on a Leaf Hunt by Steve Metzger
Children journey through forests and fields collecting colorful leaves in this rhythmic tale. It’s a lively read to inspire your own leaf-hunting adventure. - Leaf Man by Lois Ehlert
A leaf figure travels through vibrant landscapes, with real-leaf collages encouraging creativity. It’s a visual invitation to craft leaf art. - Why Do Leaves Change Color? by Betsy Maestro
This nonfiction book explains autumn’s colors with simple science and experiments. It complements leaf rubbing or stamping beautifully. - Look What I Did with a Leaf! by Morteza E. Sohi
This guide demonstrates making leaf animals like butterflies and turtles. Its step-by-step ideas inspire leaf critter or collage projects. - Red Leaf, Yellow Leaf by Lois Ehlert
A child follows a maple tree from seed to fall, with vivid leaf collages. It’s a splendid spark for rubbings or suncatchers. - Fletcher and the Falling Leaves by Julia Rawlinson
A fox tries to save his tree’s falling leaves in this sweet seasonal story. It’s ideal for discussing autumn while crafting garlands. - Trees, Leaves, and Bark by Diane Burns
A take-along guide that helps kids identify various trees, leaves, and bark.
Read these before or after crafting— again visit your local library to find them!
Leaf Art Brings Joyful Creativity
Leaf art is a gateway to creative, nature-filled fun that children (and you) will cherish. From the delightful process of leaf rubbing to stamping and more, these activities celebrate imagination, learning, and joyful moments. Pair them with our book selections for a complete leaf adventure. So, gather your basket, explore the outdoors, and let those leaves inspire marvelous creations. Have a good story to share? Such as, after leaf hunting your child now can identify 5 or even just one tree based on the shape of it’s leaves? Share them in the comments—I love to hear how these lessons bring creativity and knowledge to your homeschool.
Leaf Rubbing
AT A GLANCE ACTIVITY INSTRUCTIONS
Materials
- Leaves
- White paper
- Crayons
- Tape (Masking is best)
Instructions
- Sort the leaves your child collected (some may be too buggy or too brittle).
- Place the leaves down in the pattern in you child wants. Then place the paper on top.
- Now you can tape the paper down (if it slides your leaf rubbing may become too blurry). This is not necessary, I usually help my child hold their paper or if they’re old enough they hold their own.
- Get creative using various leaves, different crayon colors on one leaf, placement under the paper, etc.
- Discuss with your child the different leaves and their shapes.
Recent Posts on the Homeschool Blog


Love anything to do with autumn!