OUT WITH THE VELCRO SHOES
It’s time to learn to tie shoelaces.
— By Julie Hodos on March 5, 2025; Updated on January 28, 2026.

This post may contain affiliate links. Please refer to our disclosure policy.
If you’re like me, you’ve probably stared at your little one’s growing feet and wondered when it’s time to ditch the Velcro sneakers for something a bit more “grown-up” like shoes with laces. Children’s feet do grow so quickly and randomly—sometimes it feels like they sprout overnight! And let’s be real, shoes aren’t cheap. That’s why I always suggest motivating your older preschooler or kindergartener to learn to tie shoelaces before you invest in a pair of lace-up shoes. It’s not just about saving money; it’s about building independence and turning a simple skill into a fun adventure.
Table of Contents

Being able to learn to tie shoelaces is one of those essential life skills that every kid needs eventually. It’s like unlocking a new level of self-reliance—imagine your child proudly tying their own shoes before heading out to play! Here, I’ll share some practical ways to motivate your child and teach them this skill without the pressure. Let’s dive in and make learning to tie shoelaces an enjoyable experience. I’ll cover everything from when kids are typically ready, to clever alternatives for practice, step-by-step guides, and tips for knowing when it’s time for those real lace-up shoes.
When Should a Child Be Able to Learn to Tie Shoelaces?
One of the most common questions from parents is, “When is the right time for my child to learn to tie shoelaces?” Well, the short answer is that most kids are developmentally ready between 4.5 and 6 years old. But as you know, every child is unique, so that window can feel pretty wide. At this age, fine motor skills are developing rapidly—think about how they’re getting better at holding pencils, buttoning shirts, or even building with small blocks. Tying shoelaces requires coordination between hands, fingers, and eyes, plus a bit of patience and problem-solving.
Why such a range? Kids’ brains and bodies mature at different paces. Some 4-year-olds might surprise you with their dexterity, while others at 6 might still need a little more time. Factors like hand-eye coordination, attention span, and even interest play a big role. If your child is already enjoying activities that build these skills, like threading beads or playing with puzzles, they might be ready sooner.
But here’s the practical side: during those 18 months or so, your child’s feet could grow two or three sizes! If you buy lace-up shoes too early, say for a 5-year-old who’s not quite there yet, those shoes might sit in the closet gathering dust. Or worse, you’ll end up rushing to tie them yourself every morning just to get out the door on time. We’ve all been there—fumbling with laces while the school bus waits. Instead, wait until they’ve mastered the skill through practice. This way, the shoes get worn properly, and your child feels empowered rather than frustrated.
To gauge readiness, look for signs like following simple multi-step instructions and show interest in “big kid” tasks. If they’re asking you to show them how or imitating you tying your own, that’s a green light! Remember, it’s not a race. Pushing too hard can turn it into a chore, so keep an eye on their enthusiasm.

Alternatives to Buying Shoes with Laces: Smart Ways to Practice First
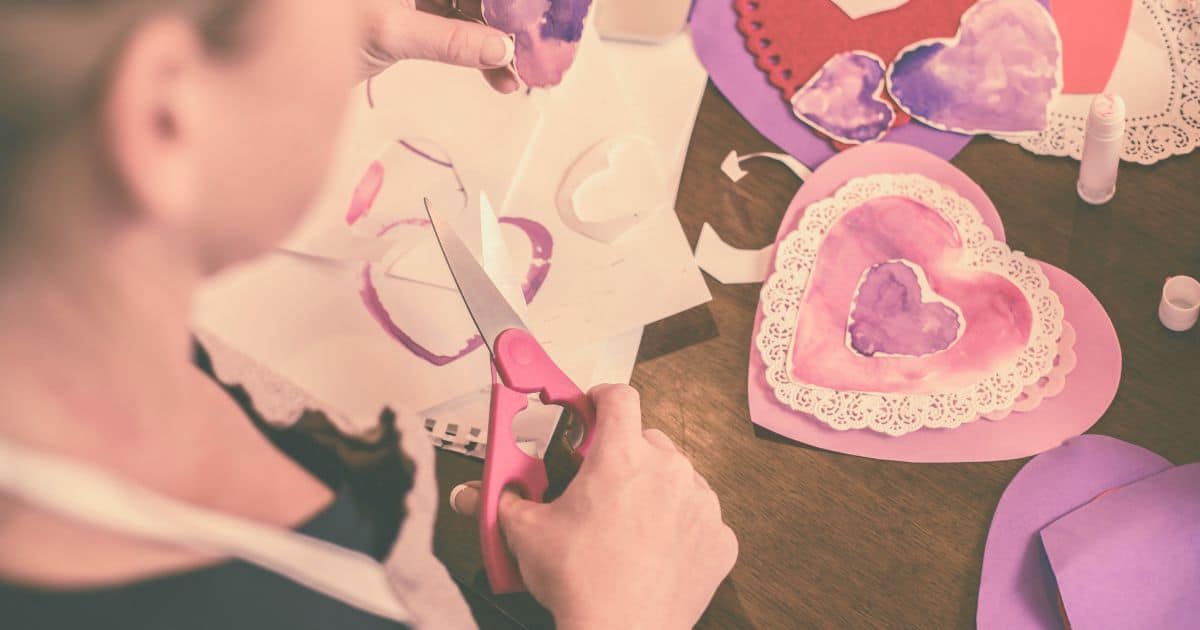
Your child is growing up so fast. But before you hit the shoe store for those trendy lace-ups, let’s make sure they can actually learn to tie shoelaces without the added pressure of real footwear. Buying shoes prematurely can lead to wasted money if they outgrow them before mastering the skill. Luckily, there are budget-friendly alternatives that let them practice in a low-stakes way. I’ll outline a few options, with extra details on my favorite one because it’s so versatile and kid-approved.
First off, dig into your closet for an old, stinky shoe with laces. Okay, maybe not too stinky—give it a quick clean! If you have a pair that’s seen better days, hand it over to your child for practice. The beauty here is that it’s real-world material; the laces feel authentic, and the shoe shape helps them visualize the end goal. Pros: No cost involved if you already have one lying around. Cons: It might not be as fun or stable for little hands, and if it’s too big or floppy, it could slip around during practice. Sit on the floor together and practice!
Second option: Grab a piece of cardboard—maybe from an old box—and punch holes to mimic a shoe’s eyelets. Thread yarn or an old shoelace through them to create a lacing board. This is super simple and customizable; you can draw a shoe outline on the cardboard for visual appeal. It’s great for portability—tuck it in a backpack for waiting rooms or car rides. Pros: Inexpensive and easy to make with household items. Cons: It lays flat, so it doesn’t quite replicate the 3D feel of a real shoe, which might make the transition harder. To amp it up, use different colored yarns to teach patterns while they learn to tie shoelaces.
Now, my absolute favorite—and the one I’ll detail more because it’s a game-changer—is combining the best of both worlds with a cardboard shoebox setup. This method turns practice into play and provides stability that the flat cardboard lacks. Kids can hold it between their legs, just like they’d position their foot, making it feel more natural.
Why do I love this? It’s engaging, promotes creativity (they can decorate it!), and builds fine motor skills from the get-go. Plus, no worries about ruining actual shoes (like being left out for a puppy to chew). Now, let’s break it down step by step so you can set it up easily at home.

How to Make a Shoebox to Help Your Child Learn to Tie Shoelaces
Alright, let’s get crafty! This shoebox activity is not only practical but also a wonderful way to spend quality time with your child. It’s hands-on, encourages creativity, and directly teaches the skill without any rush. What you’ll need is simple: a cardboard shoebox (or even a tissue box if that’s what you have), some yarn, coloring supplies like markers, crayons, or paint, and maybe some tape for the yarn ends.
Start by involving your child in the fun part—decorating the box. Let them turn it into their dream “shoe.” They could draw patterns, add stickers, or paint it in their favorite colors. This step builds excitement and ownership; when it’s “their” creation, they’re more motivated to use it. Depending on the box material, choose washable markers for cardboard or paints for sturdier ones. Pro tip: If the box has a lid, remove it or tape it down for stability.
Next, prepare the holes. As the adult, use a knife, pencil, or hole punch to create two holes on one solid side of the box. Space them about a thumb’s length apart—close enough to mimic shoe eyelets but not too tight for little fingers. If you want to make it more advanced, punch four or six holes in a row to simulate a full shoe lacing pattern.
Now for the yarn: Cut a piece about the length from your elbow to your fingertips. I keep a stash of colorful craft yarn on hand—it’s affordable and comes in fun shades that make the activity pop. To make the ends easier to thread (and less frayed), wrap a bit of tape around them, just like aglets on real shoelaces. If you’re doing more holes, cut longer yarn accordingly.
Hand over the threading to your child—this is excellent fine motor practice! Guide them to push the yarn through the holes so the ends stick out from the top, resembling untied laces. If it’s tricky at first, demonstrate once and let them try. Praise every effort!
Voila! Your shoebox is now a pretend shoe ready for action. The shape allows your child to wedge it between their knees or thighs for hands-free stability, which is a huge plus over flat options. It’s like practicing on a real foot without the wiggles.

Practice Time
With your shoebox ready, it’s time to practice! The key here is patience and fun—think of it as playtime, not a lesson. Position the box securely between their legs so it doesn’t slide around; this mimics sitting to tie real shoes and builds muscle memory.
How you teach tying will depend on your family’s style. Some folks swear by the “bunny ears” method: Cross the laces to make an X, pull one under the other to form a knot, then make two loops (the ears), cross them, and pull through. Others use the “tree and bunny” story: The knot is the tree, one loop is the bunny ear, the bunny runs around the tree and into the hole (pull through).
Whatever method you use for your own shoes, stick to that—consistency is key. Sit beside them, not across, so they can mirror your actions. Demonstrate slowly: “First, cross the laces like this… now pull tight.” Then, guide their hands gently without doing it for them.
Break it into mini-steps to avoid overwhelm. Day one: Just practice crossing and knotting. Day two: Add loops. Use songs or rhymes to make it memorable—there’s a fun “Bunny Ears” rhyme online: “Bunny ears, bunny ears, playing by a tree. Criss-crossed the tree, trying to catch me…” Sing it together!
Common pitfalls: Tight knots that won’t undo—teach them to loosen gently. Or lopsided loops—encourage even sizes. If frustration creeps in, switch it up.” Reward progress with stickers or high-fives, not criticism.
Practice sessions should be short—10-15 minutes a day—to keep it enjoyable. Integrate it into routines, like before storytime or after snack.
Benefits abound: Beyond the skill, it boosts confidence, fine motor control, and even sequencing skills (first this, then that). Studies show kids who master self-care tasks early have higher self-esteem. Plus, it’s bonding time—share stories of when you learned!

You’ll Know When Your Child is Ready for Shoes with Tie Shoelaces
The best part of this shoelaces approach? No buyer’s remorse! You’ve practiced without committing to expensive shoes. Watch for readiness signs: They can tie the shoebox independently multiple times, show excitement about real shoes, and handle the steps without help.
Use it as motivation: “Once you master this, we’ll pick out cool lace-up sneakers!” When transitioning, start with easy-lacing shoes—wide eyelets, soft laces. Practice on the new pair at home first.
If they’re not quite there, no biggie—step back for a week or two. Challenge your child by pushing gently but frustration means it’s time to pause. Every kiddo hits milestones at their pace.
Troubleshooting tips: If hands tire quickly, build strength with playdough or pinching games. For left-handers, adapt methods. If attention wanes, make the practice sessions shorter.
Integrating into daily life: Once learned, encourage tying every day so that your child doesn’t forget the steps. This early in the process could cause your child to forget a step or two if not revisited frequently. Praise continuously: “Look what you did all by yourself!” This reinforces the skill.

What If It’s Just Not Clicking?
Sometimes a child is the “right age” but the skill still feels like climbing Mount Everest. That’s totally normal! Here’s what to do instead of pushing harder:
- Check hand strength and dexterity first. Can they squeeze a turkey baster or pick up pom-poms with clothespins? If not, sneak in 5–10 minutes a day of playdough squishing, spray-bottle water fights, or tearing paper into strips. Those tiny hand muscles need to bulk up before laces feel easy.
- Shorten the session, increase the frequency. Five focused minutes three times a day beats one frustrated 20-minute battle. Stop while it’s still fun — always end on success.
- Try the “two-loop” (bunny ears) method vs. the “one-loop chase” method. Some kids’ brains click with one and hate the other. Experiment for a week on each and let them choose their favorite.
- Take a break. Put the box away for two or three weeks. I’ve noticed with my own kiddos that sometimes a concept needs to be completely ignored for a brief period of time and some how when we come back to it, the switch has flipped. Their brain was quietly working backstage.
- Celebrate the micro-wins. “You made the X all by yourself!” or “That knot stayed tied, great job!” feels a lot better than “Let’s try again because it came undone.”
Remember, learning to tie shoelaces is a marathon, not a sprint. You’re teaching perseverance and coordination alongside the actual bow — and those lessons stick forever. Keep it light, keep it playful, and one random Tuesday you’ll look over and see them tying without even thinking. That’s the magic moment!

Exploring Different Types of Knots
Congrats—your little one has conquered the basic shoelace bow! That’s a huge milestone, and now’s the perfect time to build on that momentum by introducing other simple knots. Why bother? Well, knots aren’t just for shoes; they’re everywhere in daily life, from tying packages to crafting bracelets or even basic outdoor skills like securing a tent rope.
Plus, experimenting with new knots sharpens those fine motor skills, boosts problem-solving, and keeps the learning playful. Think of it as an extension of your shoebox adventures—I encourage you to grab some extra string to try these out. I’ll focus on kid-friendly options that are safe, easy to untie, and fun for kiddos. Start with one or two, demonstrate slowly, and let them practice at their own pace. If they’ve enjoyed braiding, simple sewing projects, or learning survival skills before, this will feel like a natural next step.
- The Square Knot (or Reef Knot): This is a great first “upgrade” because it’s sturdy and symmetrical, like tying two bows together. How to do it: Take two ends of yarn, cross right over left and pull tight (like the start of a shoelace knot), then cross left over right and pull again. It’s perfect for tying parcels or making friendship bracelets. Practical tip: Use it to secure a homemade gift wrap—your child can “help” package a sibling’s birthday present. Learning perk: Teaches balance and even tension, which helps with coordination.
- The Clove Hitch: Sounds fancy, but it’s super simple for wrapping around objects. Loop the yarn around a stick or pencil twice, then tuck the end under the second loop and pull. Kids love this for “tying up” toy boats to a “dock” or attaching yarn to a craft stick for a mini flag. If you’ve done any weaving or blanket-tying activities, this builds on that wrapping motion. Pro: Easy to adjust and undo, reducing frustration. Fun twist: Turn it into a game by “hitching” stuffed animals to a “wagon” made from a shoebox.
- The Bowline Knot: Often called the “rescue knot” because it forms a secure loop that doesn’t slip. Make a small loop in the yarn, then bring the end up through it, around the standing part, and back down through the loop—pull to tighten. It’s ideal for creating handles on bags or even a pretend lasso for play. Safety note: Supervise closely, as loops can be tempting for rough play. My boys have played with this knot before and they can get into mischief like looping on door handles and such. It’s a step up in complexity, so save it for after they’ve nailed the basics.
- The Figure-Eight Knot: This one’s a stopper knot, meaning it creates a bulky end to prevent slipping through holes. Fold the yarn back on itself to make a loop, then wrap the end around and through the loop to form an “8” shape—pull tight. Use it on the ends of drawstrings or to finish off a beaded necklace. If your family has tried pasta threading or similar crafts, this adds a professional touch. Bonus: It’s visually satisfying and quick to learn, great for short attention spans.
- The Chain Knot (or Monkey Braid): For a creative twist, this makes a braided chain without needing three strands. Loop the yarn repeatedly through itself to form a chain—it’s like magic! Pull the end through the last loop to secure. Kids can make keychains or pet leashes for toys. It ties back (pun intended) to any braiding practice they’ve done, reinforcing patterns and sequences.
To make these engaging, set up a “knot station” —add sticks, rings, or thicker rope for variety. Use colorful yarns to spot mistakes easily, and turn it into a challenge: “Can you tie a square knot faster than last time?” If things get tangled, remember the golden rule: pause, untie, and try again. These knots open doors to more advanced skills, like basic sewing or outdoor exploration, all while keeping that sense of accomplishment alive. Before long, your child might be teaching you a thing or two!

More Creative Activities for Kids
I hope this shoebox, shoelace tying activity sparks joy in your homeschool. For more life skill activities, crafts, science, math, and homeschooling resources I encourage you to explore the blog. We have lots of play based learning activities as well as tips for homeschooling. Share in the comment section below how shoelace tying has gone for your kiddos and any advice you may have! With a little encouragement and tips our kiddos will be tying their shoelaces in no time.
Learn to Tie Shoelaces
AT A GLANCE ACTIVITY INSTRUCTIONS
Materials
- Yarn
- Cardboard shoe box, kleenex box, or box
- Markers, paint, or crayons
Instructions
- To begin, your child can color the box with whichever medium you prefer. This will also depend on the box you chose.
- Take the cardboard box and using a knife pierce two holes in a side that is solid. The holes should be about a thumbs length apart.
- Next, cut the yarn to be about the length of elbow to fingertips.
- Then wrap tape around the ends to secure the strands and mimic actual shoe laces.
- Your child can do this next step. Thread the yarn through the holes so that the ends come out of the box.
- Now have them place the box securely between their legs. The box shouldn’t move and you can step your child through how to tie shoelaces.
- This will look different from family to family. Some create bunny ears while others create a tree, have the bunny run around the tree, and into their den.
- However you tie your own shoes is how you should show your child.
- Sit with them and demonstrate. Then allow them to try with your guidance.
- They now have an easy and fun way to practice tying shoelaces.
Recent Posts on the Blog